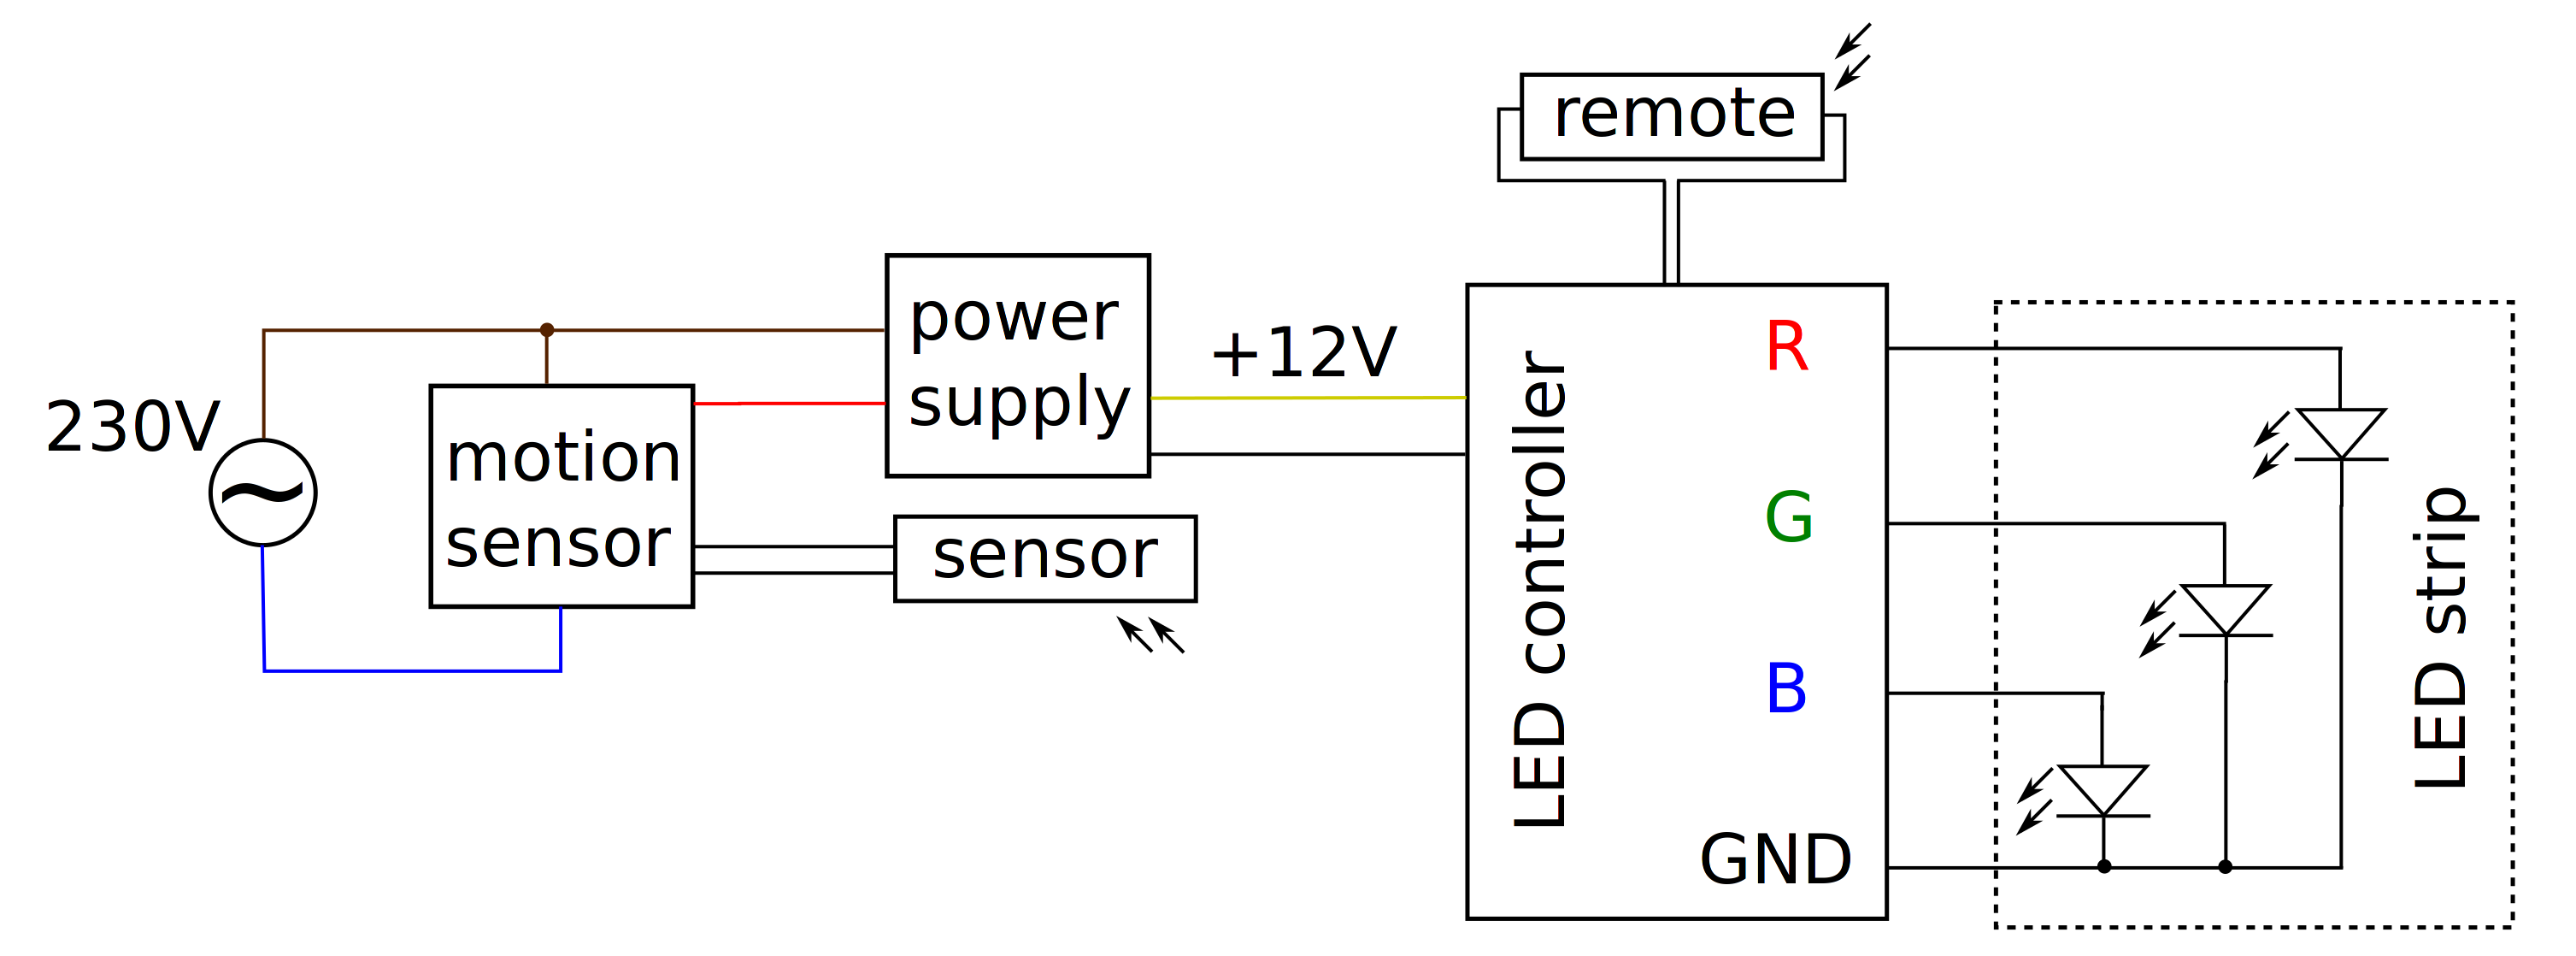
LED Strip with Motion Sensor
LED strips are nothing new today. They come in in different lengths (up to 10m), types (waterproof and non-waterproof, 30 or 60 LEDs per meter, …) and colors. You can choose between warm or cold white LEDs and even RGB LED strips, which use three independent LEDs (Red, Green and Blue), are available.
Best of all: they are ridiculously cheap!
With this project I want to create a custom lighting under my bed, triggered by a motion sensor.
# Ingredients
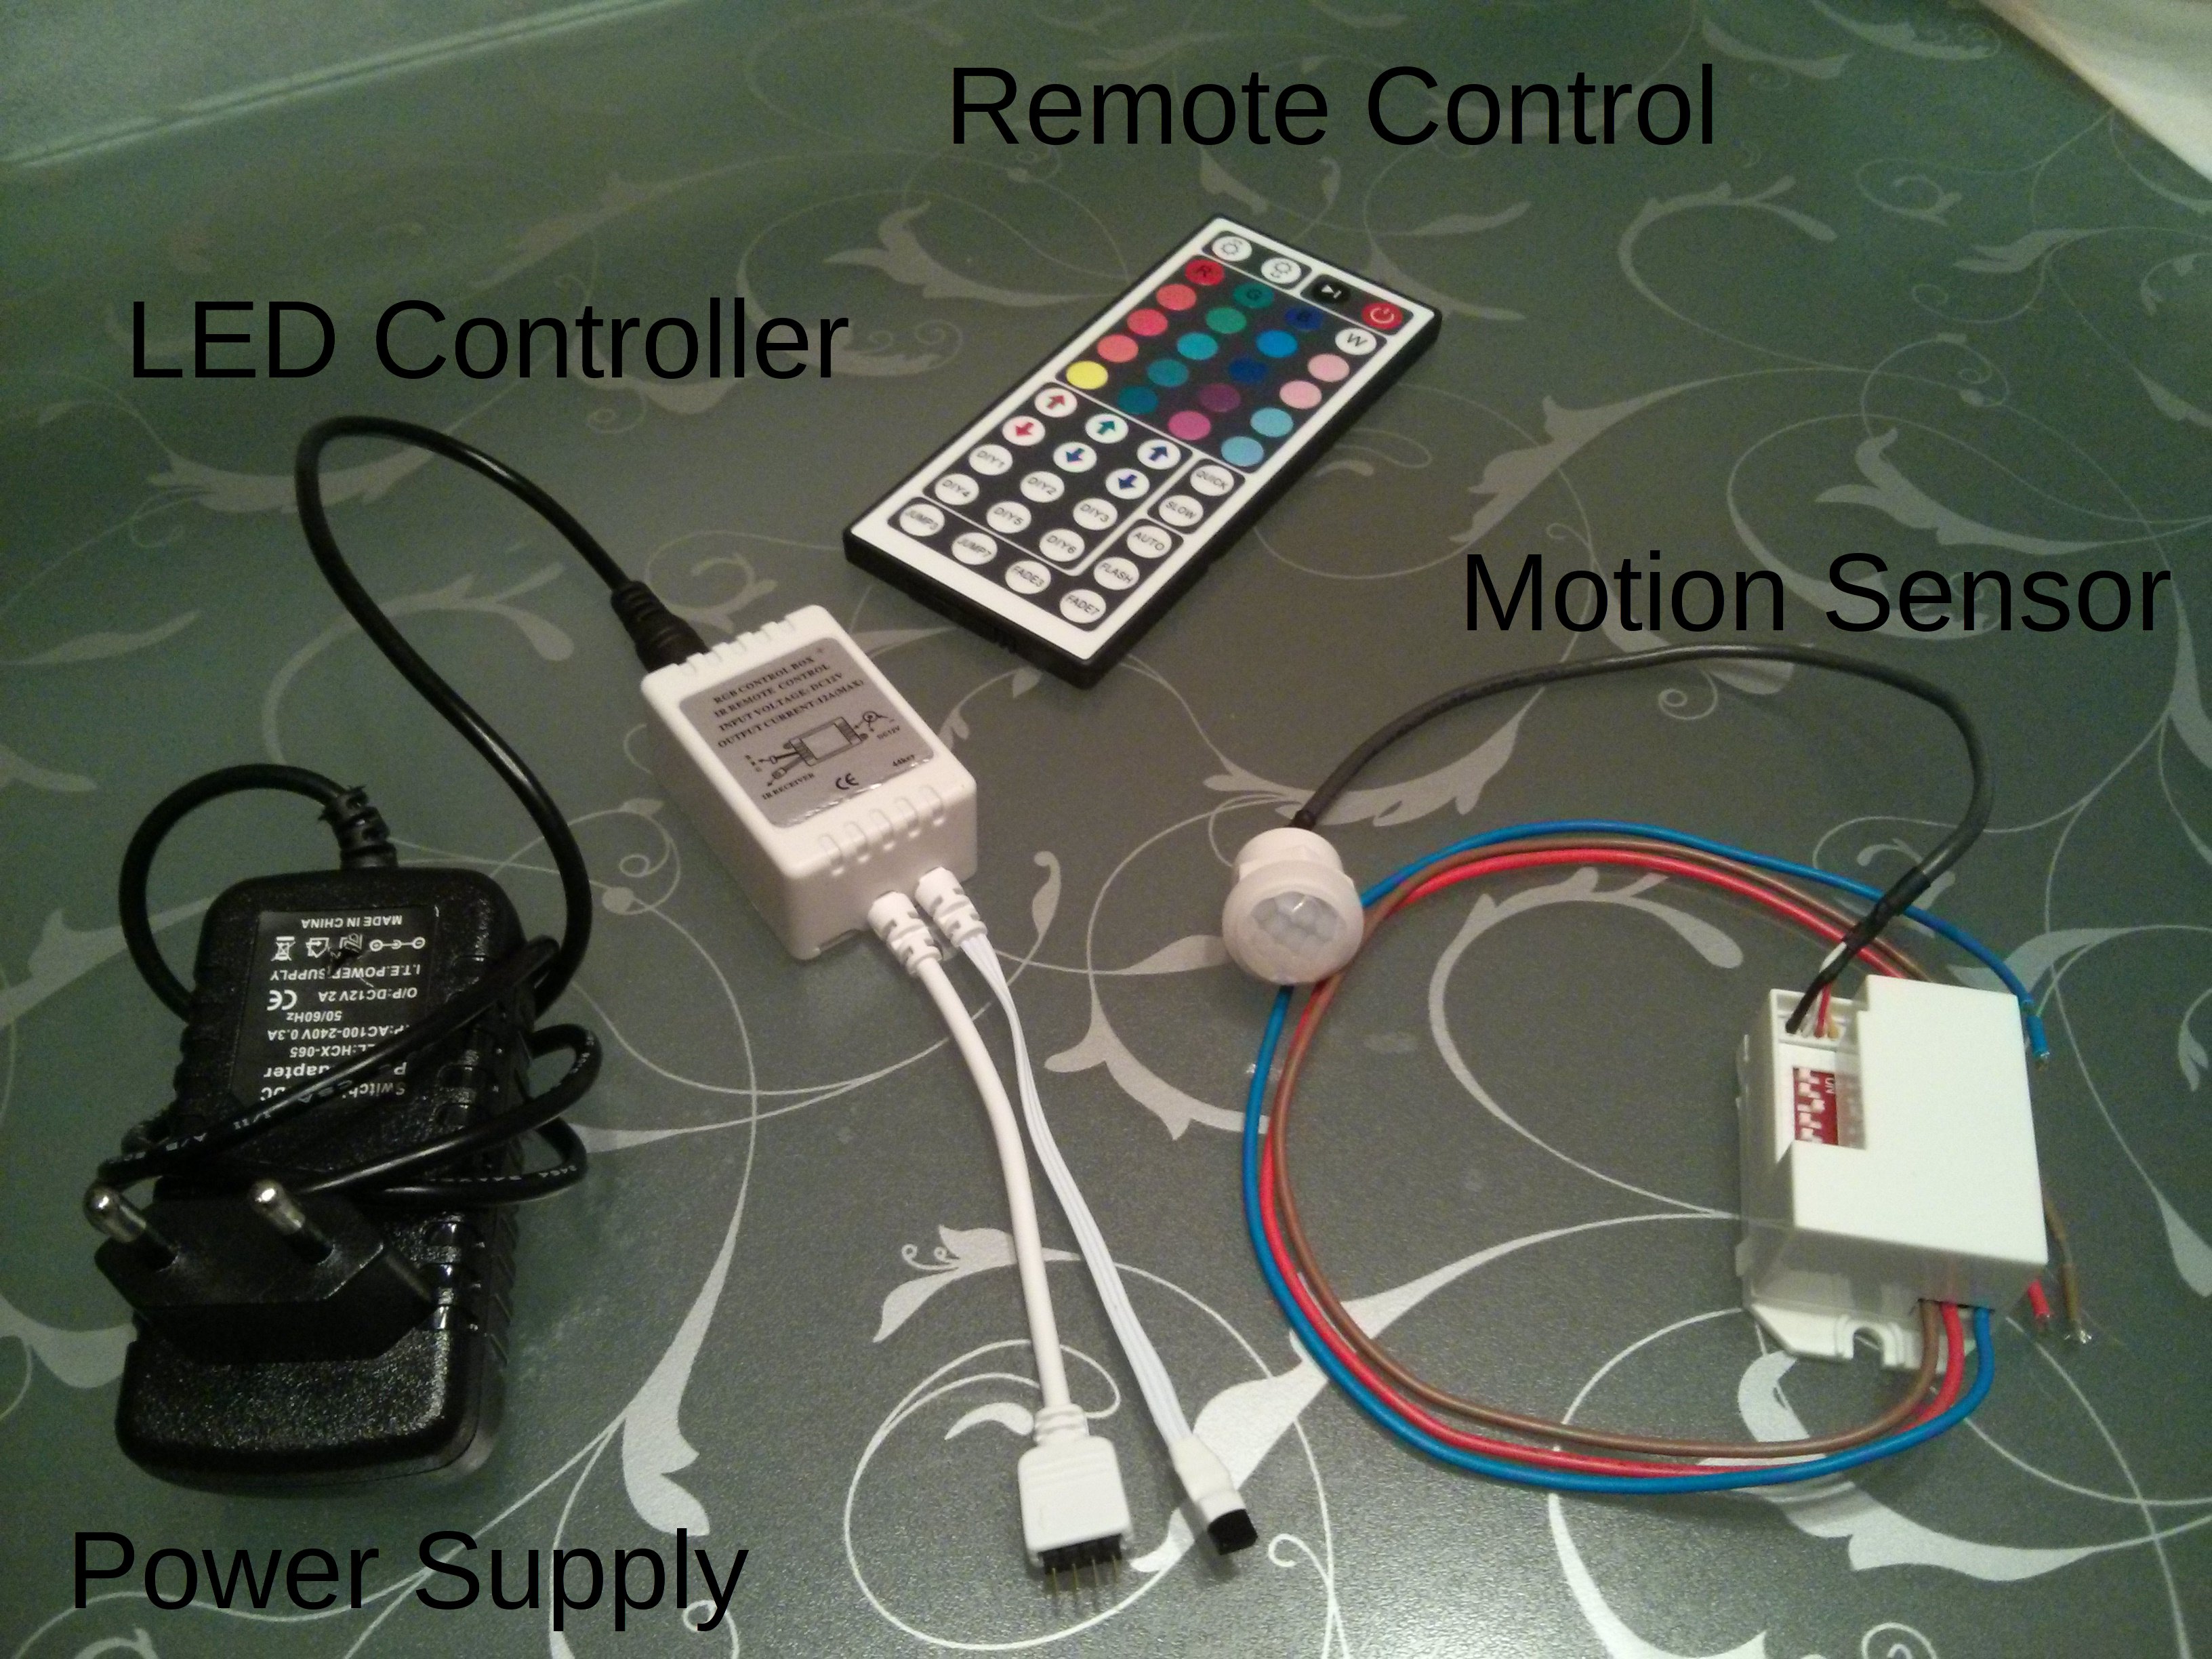
I used a 2 meter RGB LED strip which came with a power supply, LED controller and a remote control. The LED controller and remote control are necessary because this is a RGB LED strip, if you choose to go for a (e.g.) warm white LED strip, these are not required.
http://www.ebay.de/itm/252380427422
Additionally I bought a 230V (mains) PIR (Passive InfraRed) motion sensor:
http://www.ebay.de/itm/131611722256
Until now, they are all nicely packaged, but as real DIY’ers we need to change that!
# Disassembly
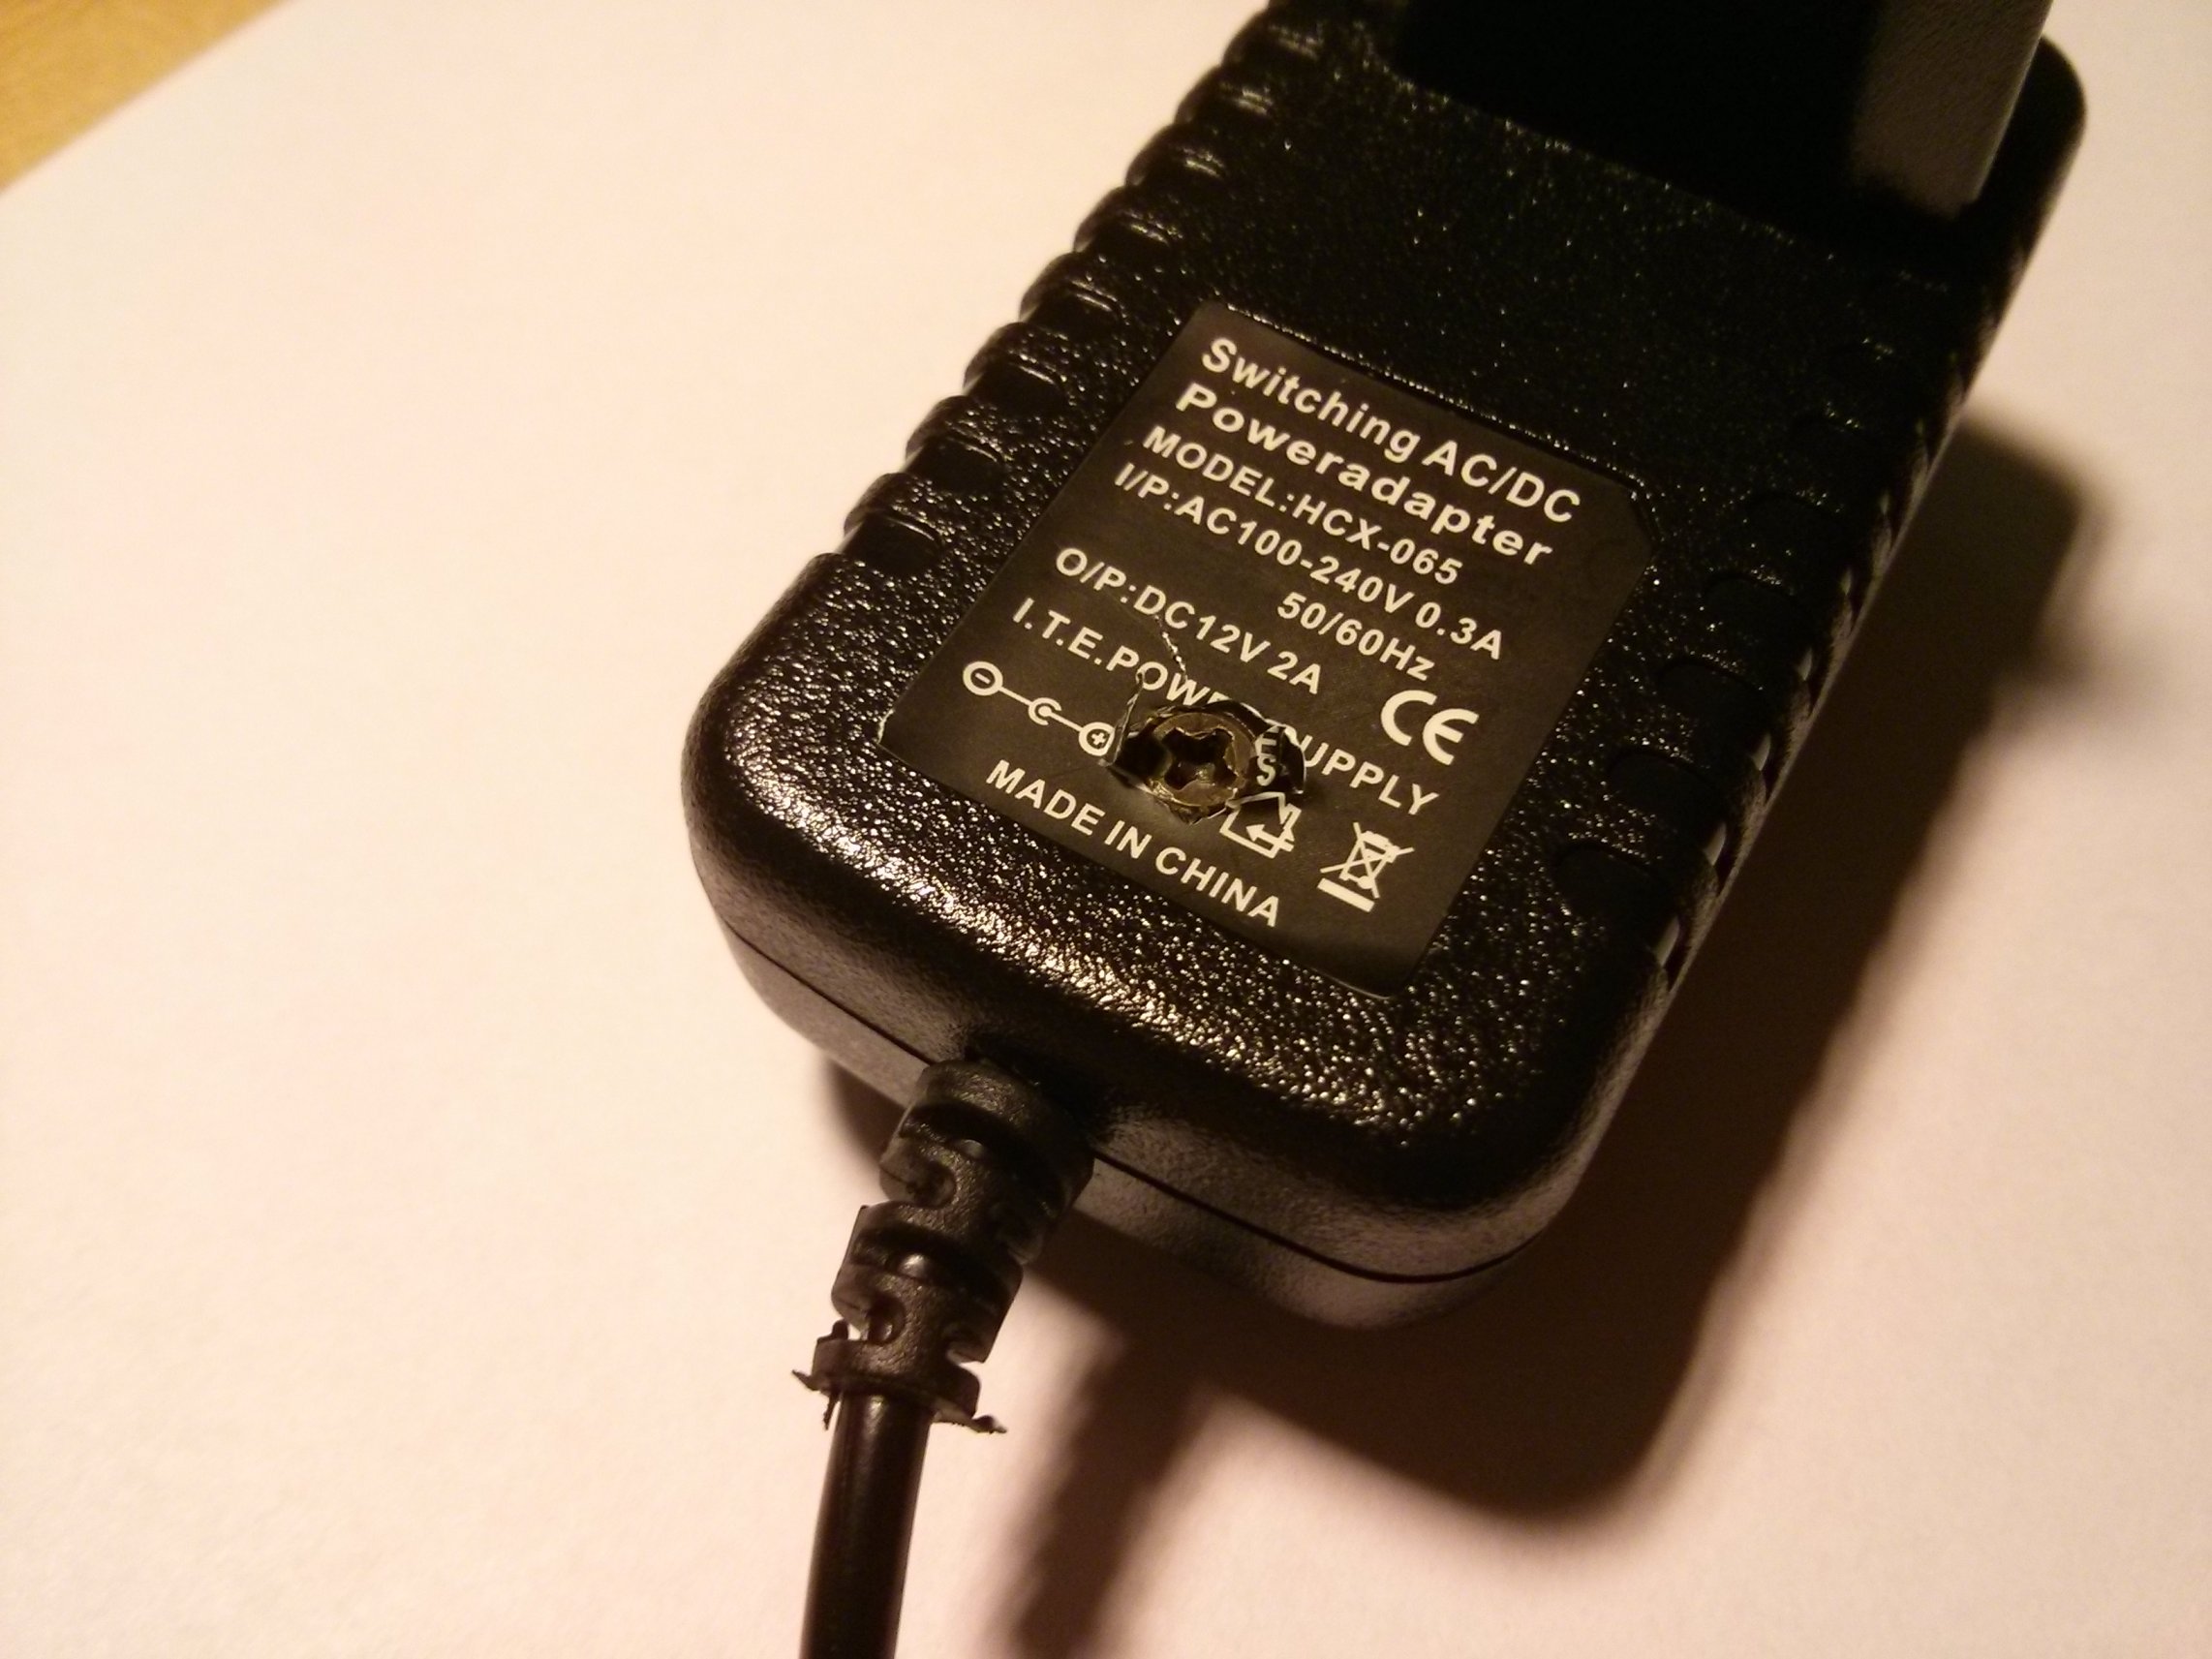
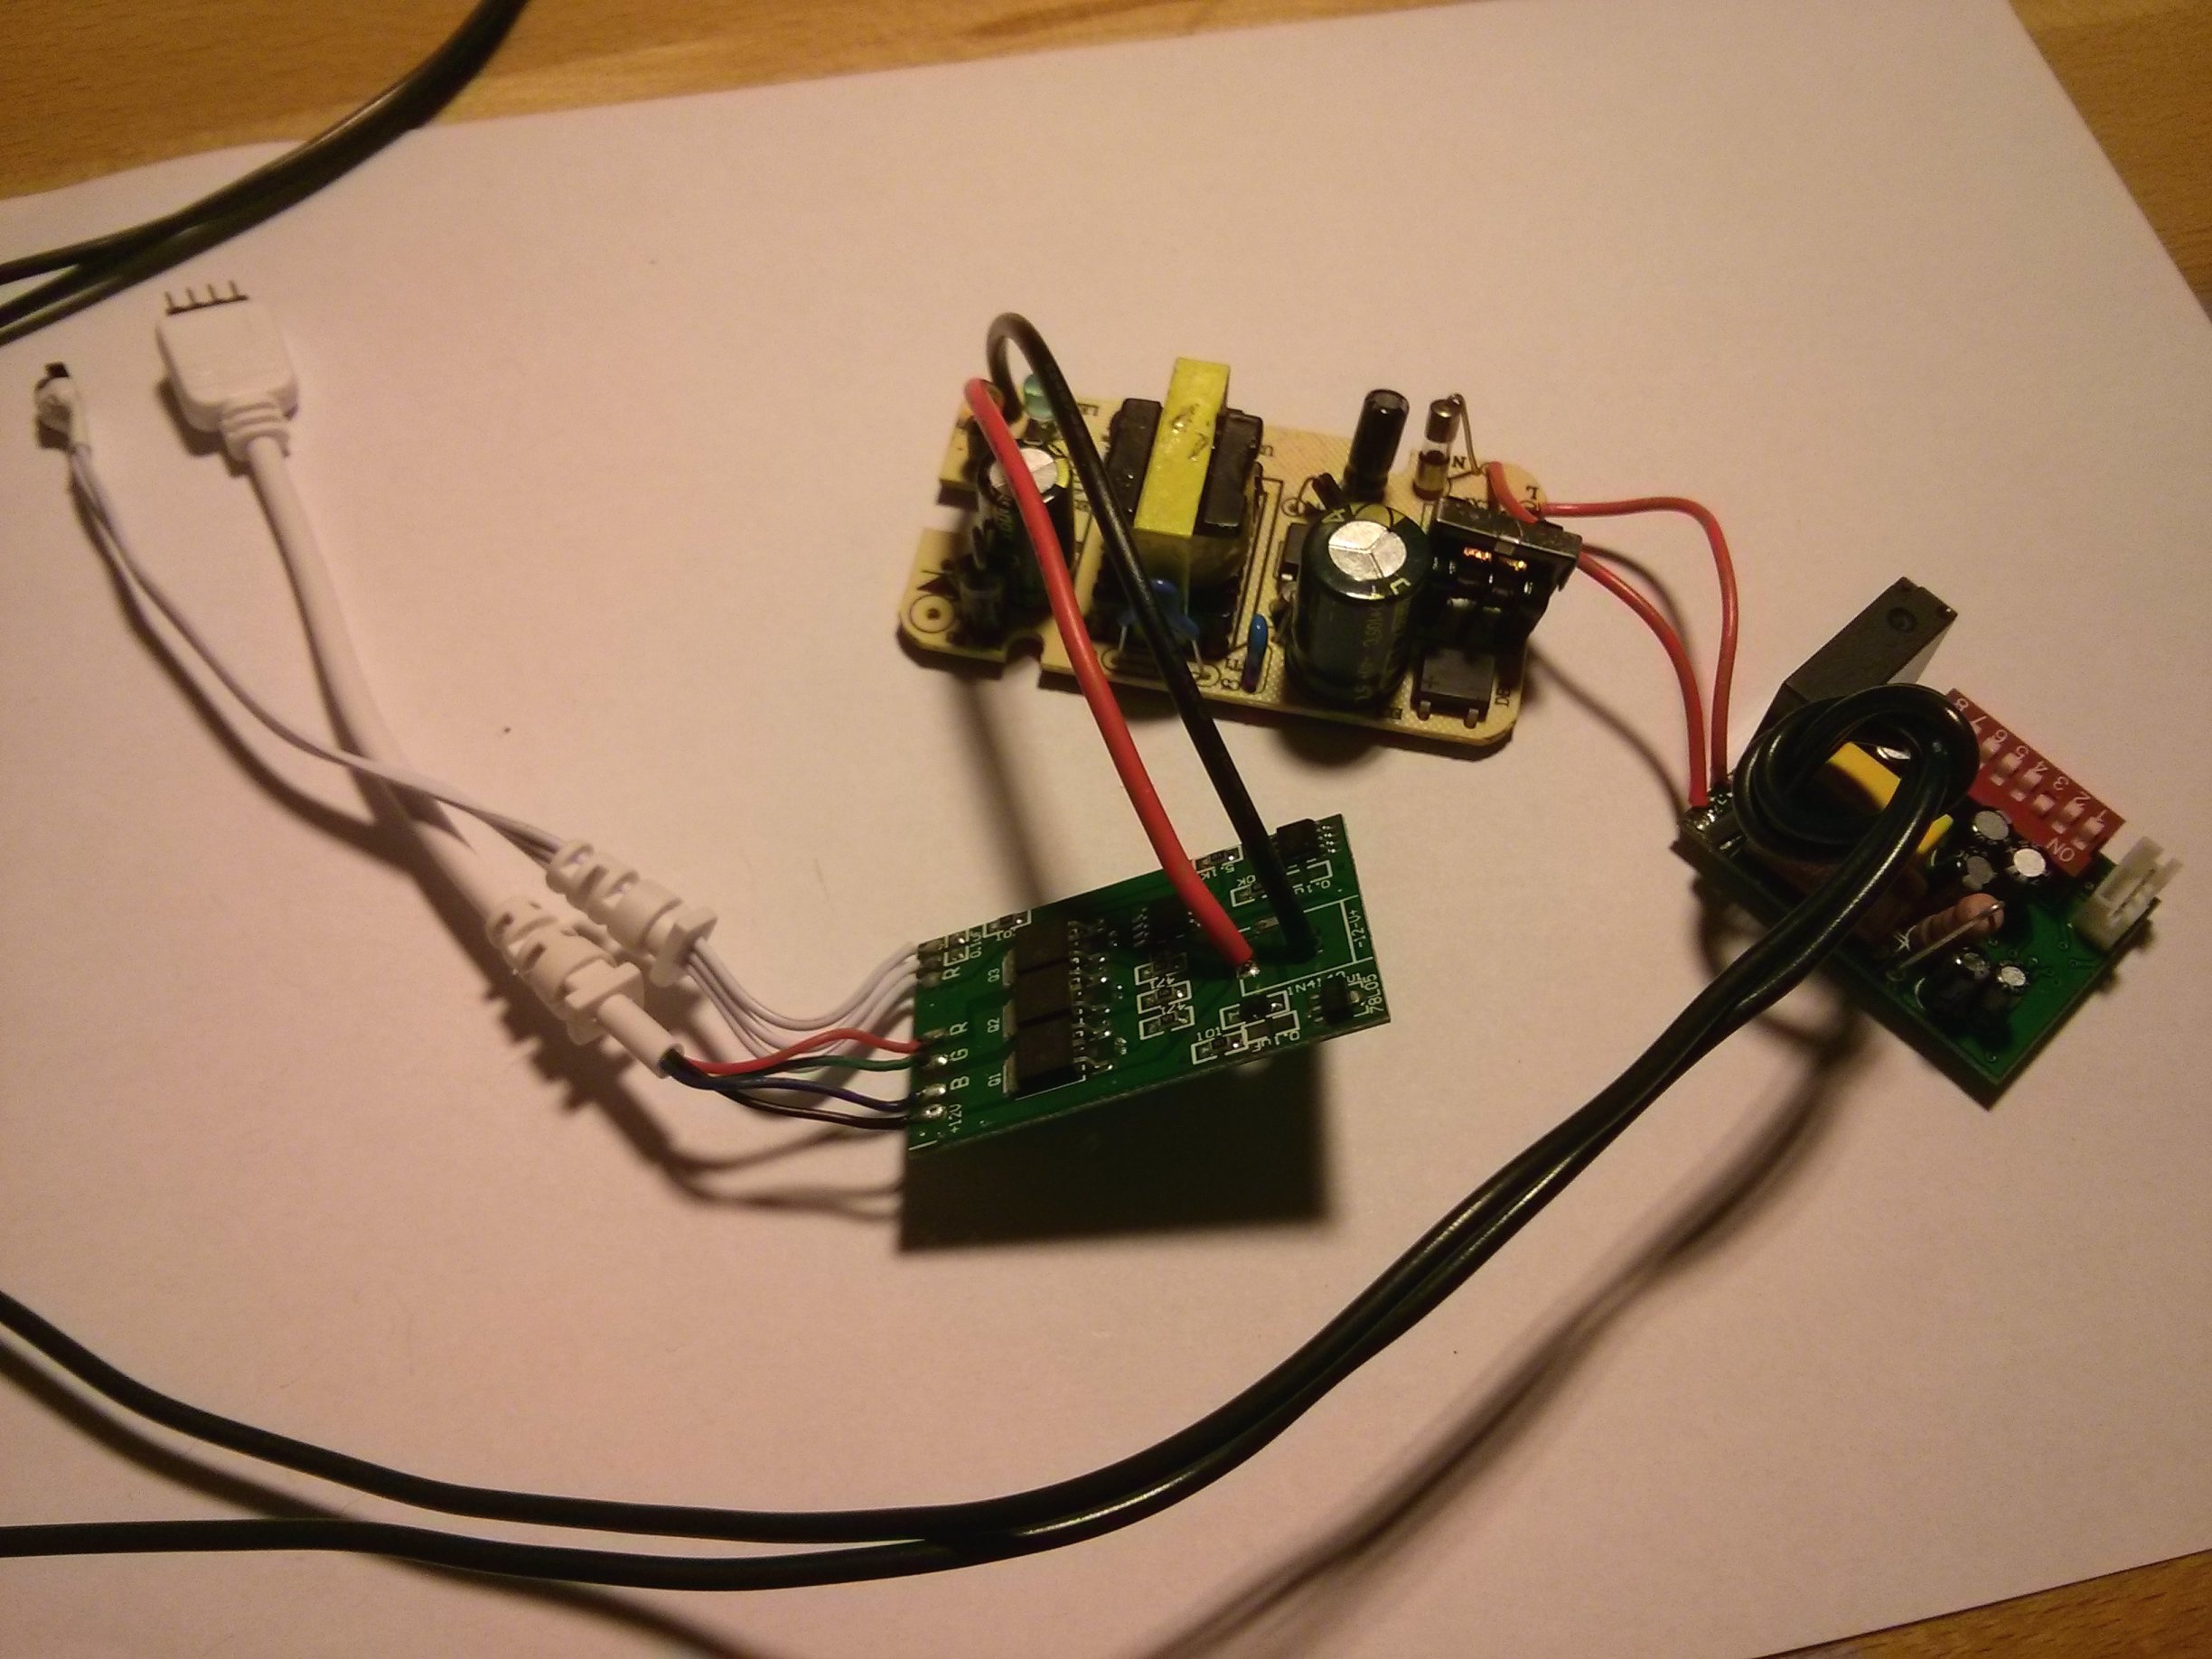
Let’s start by taking apart the power adapter. The tricky part here was to find the screw (located under the label), after that it was just a matter of taking the screw out and desoldering the mains connectors.
This is what the power adapter looks like without the casing:

On the bottom-left you can see the mains input, the bottom-right has the 12V DC output (marked + and -). In the middle is the transformer (with the yellow top) and some smoothing capacitors as well as some other circuitry.
Next up: the LED controller. This case was not meant to be opened after being closed in the factory. But since its only plastic, we can simply apply some force and the plastic case comes apart …
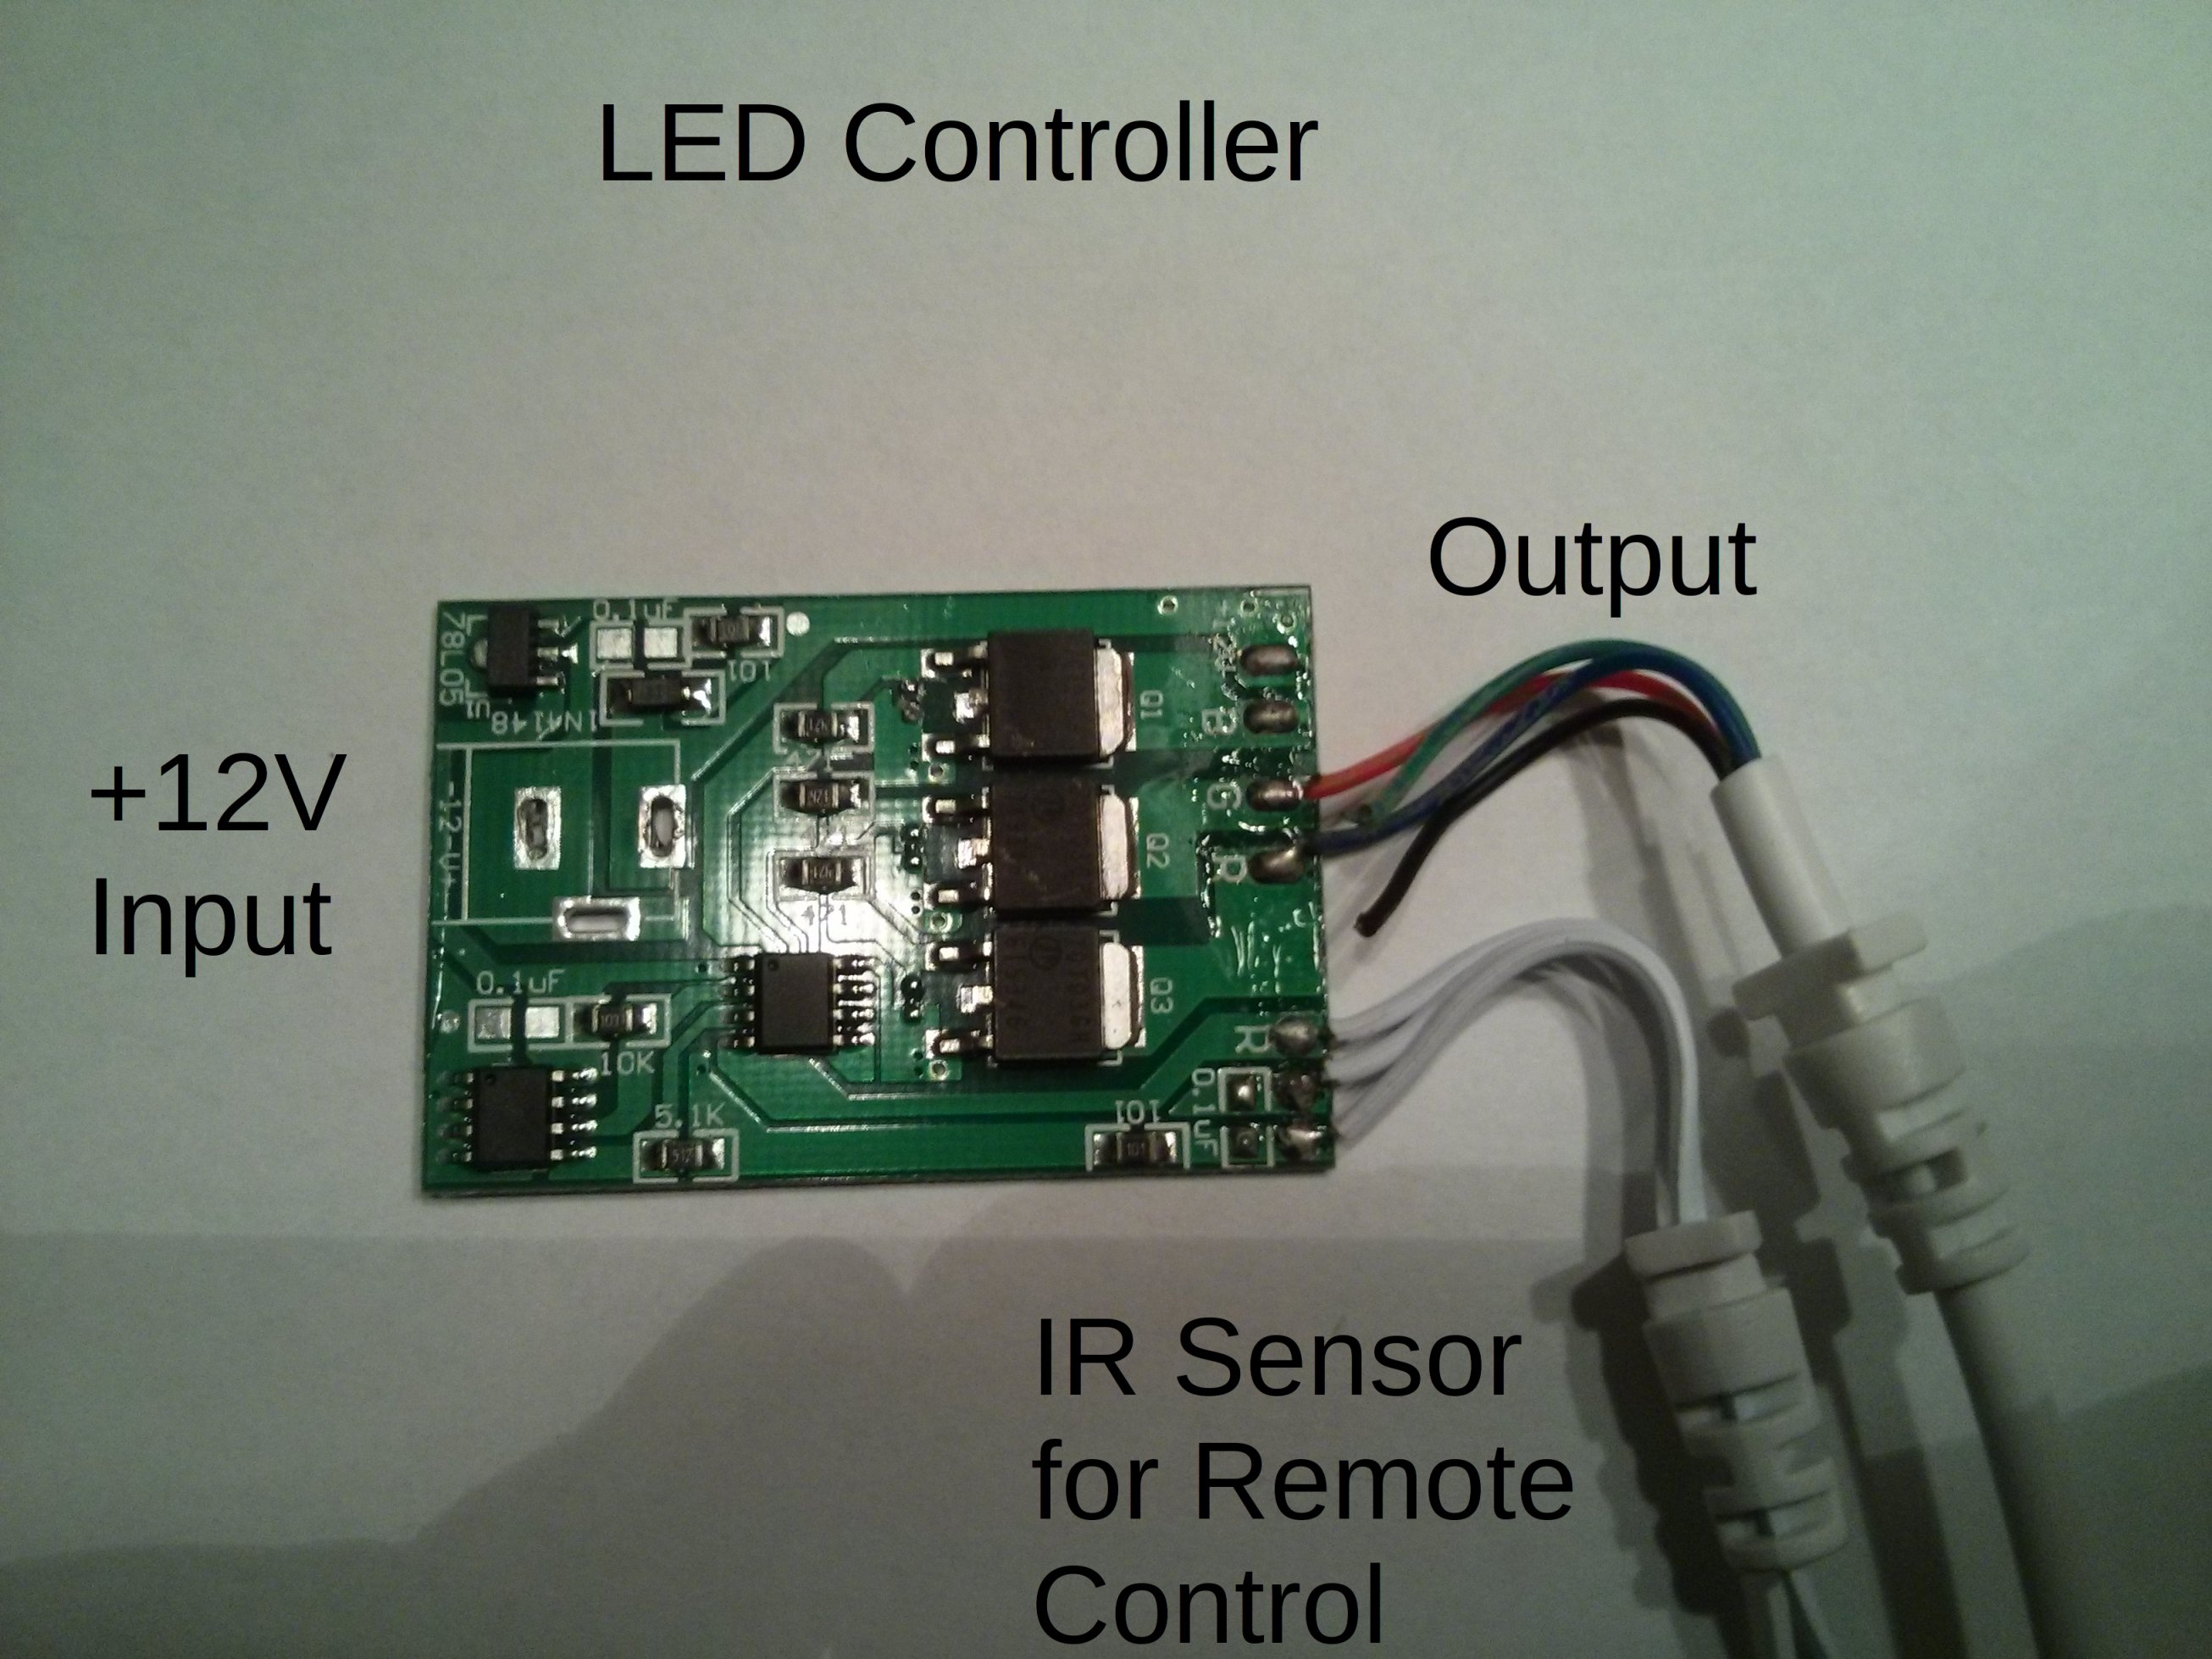
I already went ahead and desoldered the 12V jack (now there are these three fairly large holes on the left). Whilst doing that the connectors for the LEDs came lose (on the right) - oh well, just soldering the back on.
Last but not least: the motion sensor. Fairly easy, the case was just clipped together. However, before you do this I recommend testing the motion sensor. After having put everything together I spent a fair amount of time debugging the whole thing, only to find out the relay of my motion sensor was unreliable. If I had tested the motion sensor before, I would have saved quite some time (and nerves!).
The second one worked flawlessly.
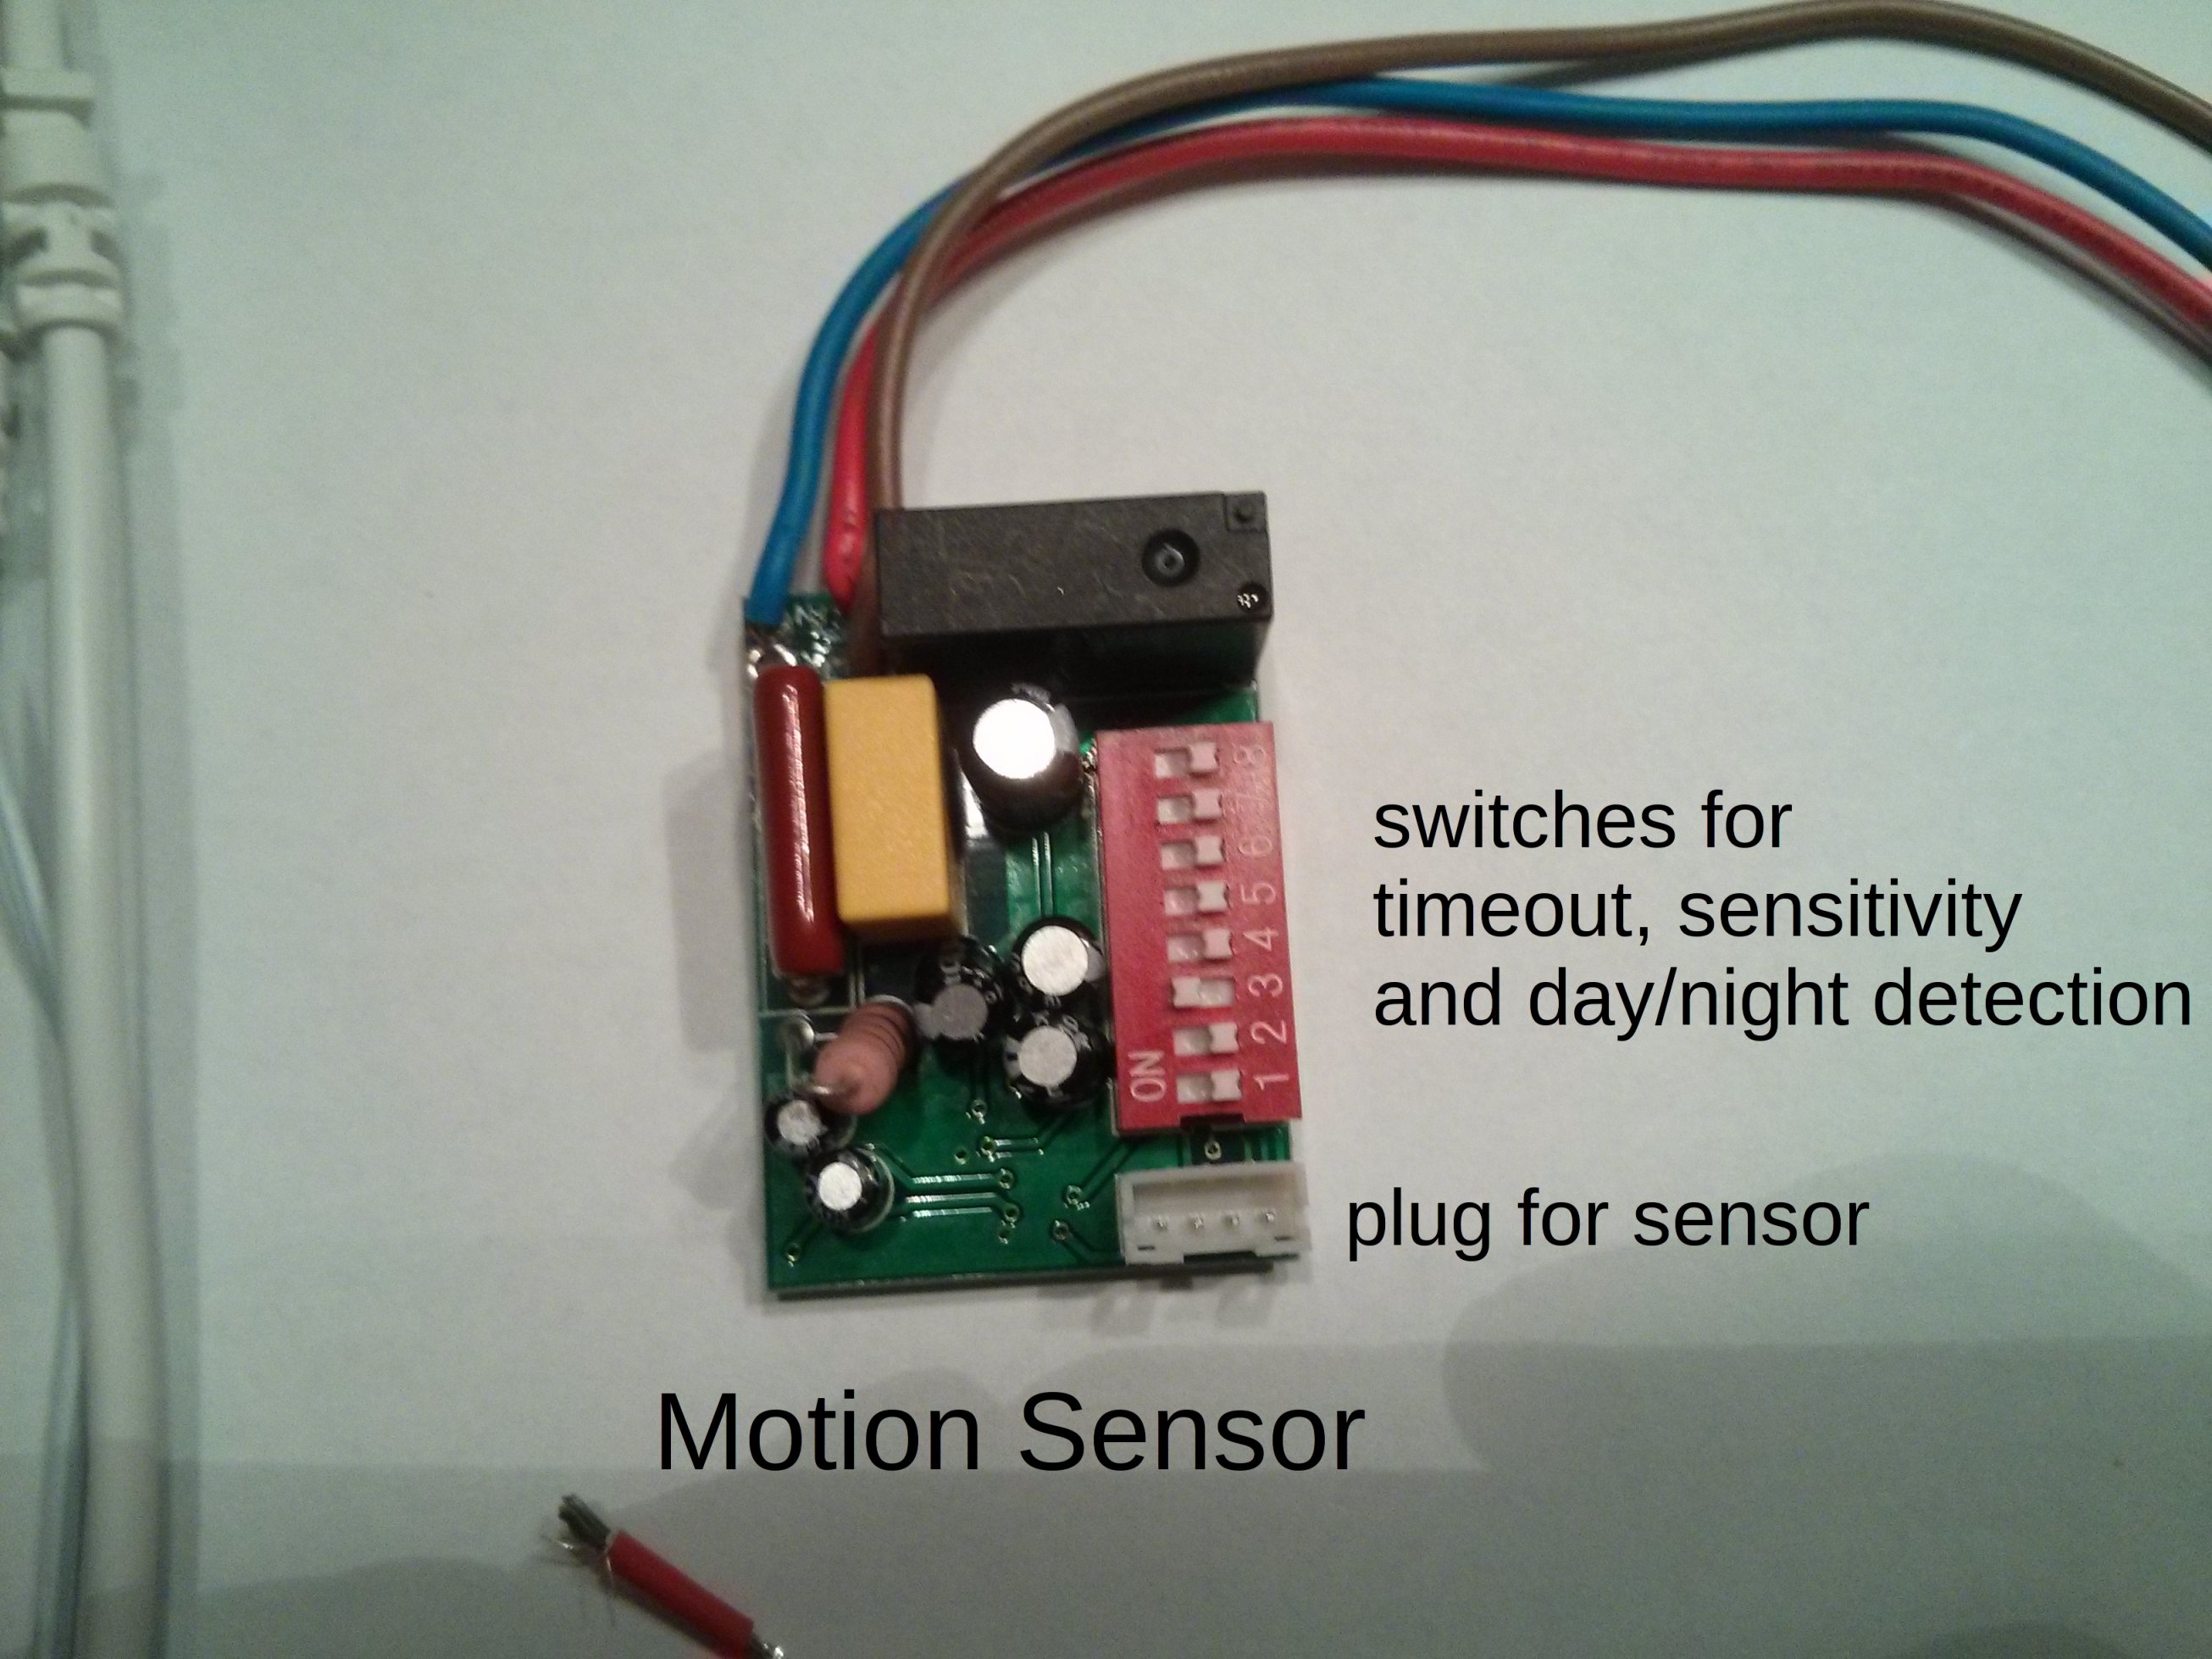
On the right you can see the various switches for timing and configuring (day/night detection, sensitivity) the motion sensor has. Below that is the plug for the detector.
The broken relay of my first motion sensor:
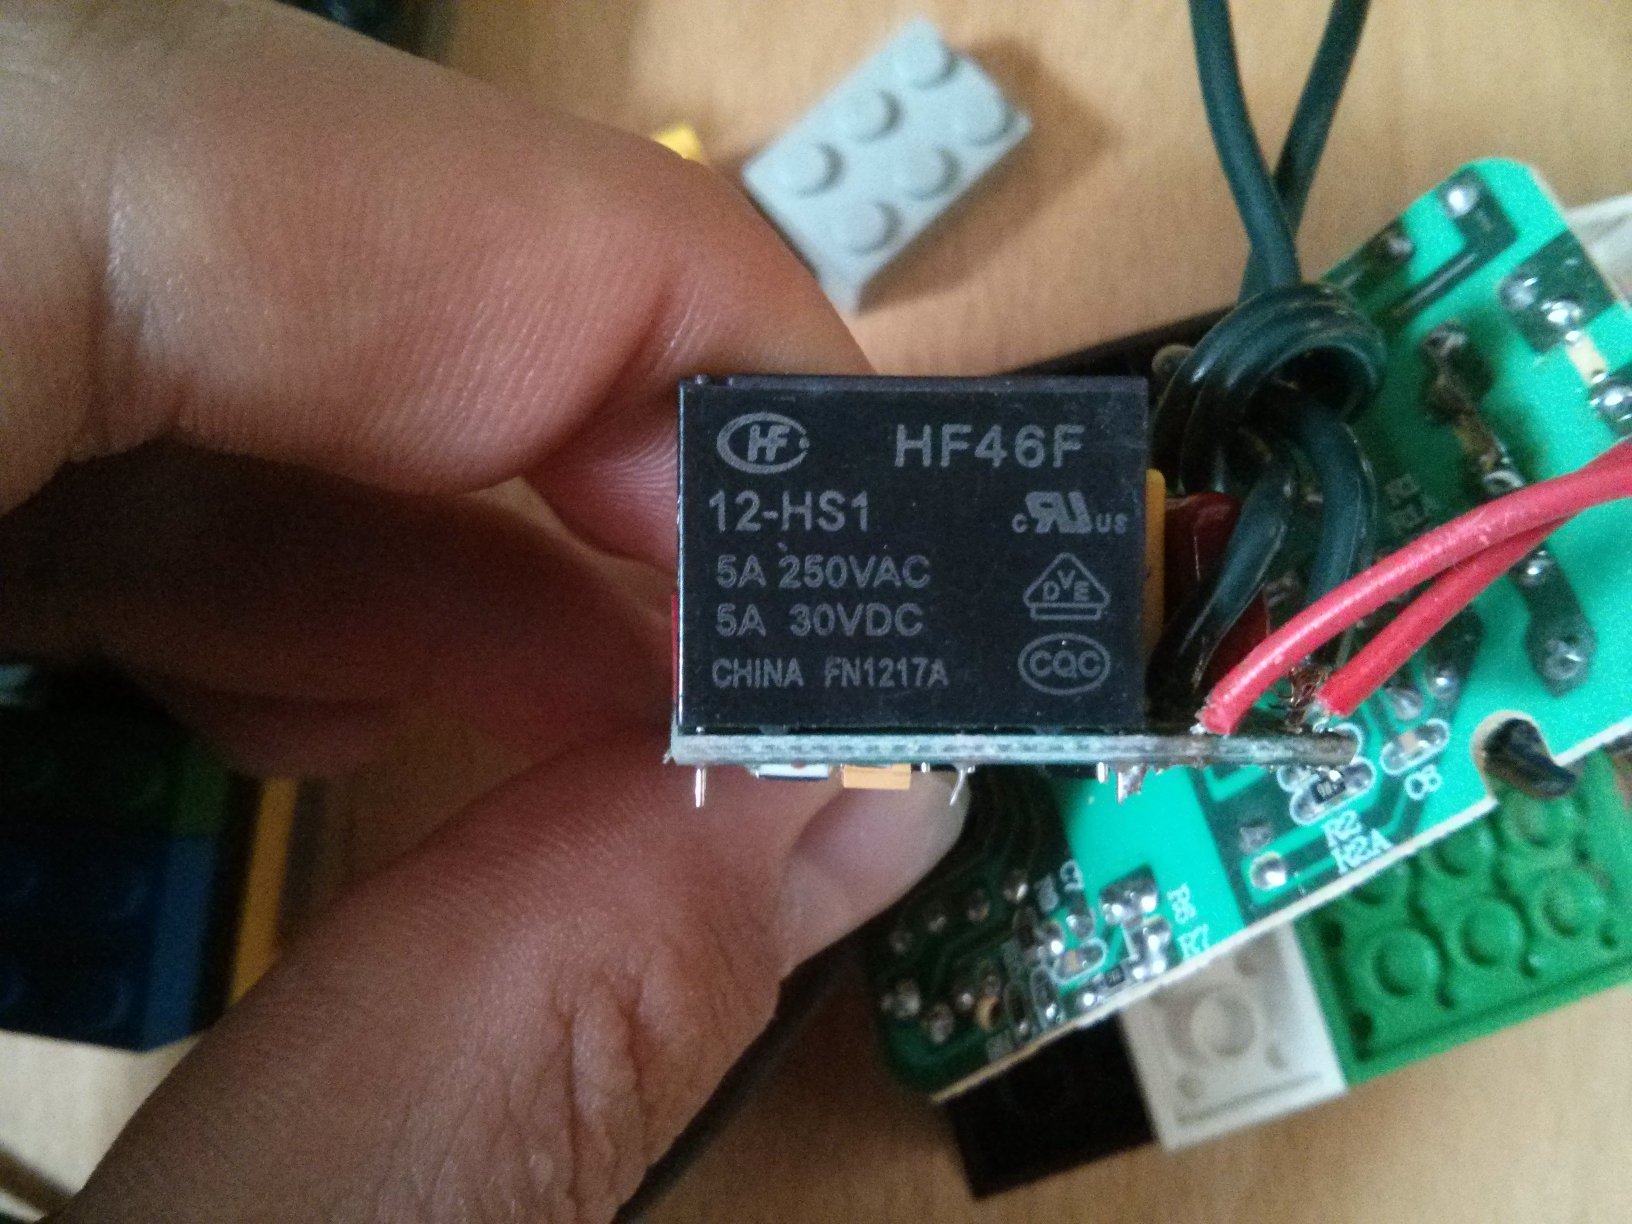
As you can see, the cables are already soldered on and everything is connected – lesson learned: test your parts before assembling them!
# Assembly
Now, let’s assemble it all back together! First we need to connect the motion sensor with our mains input and hook up the motion sensor to the power supply. That way, the motion sensor not only turns off the LEDs but also the power supply for the LEDs which has the advantage of preventing any leakage when idling.
After a bit of soldering, the job was done:
But now all the parts are just dangling about. We need a case.
# Case
I first thought about creating a 3D-printed case. Unfortunately, my 3D-modeling skills are rather weak and 3D printers aren’t exactly easy to come by, though I have a FabLab at my University, therefore this wouldn’t have been an issue. Next thing that came to mind was a wooden case. However, this would have probably taken more work than the electronics themselves.
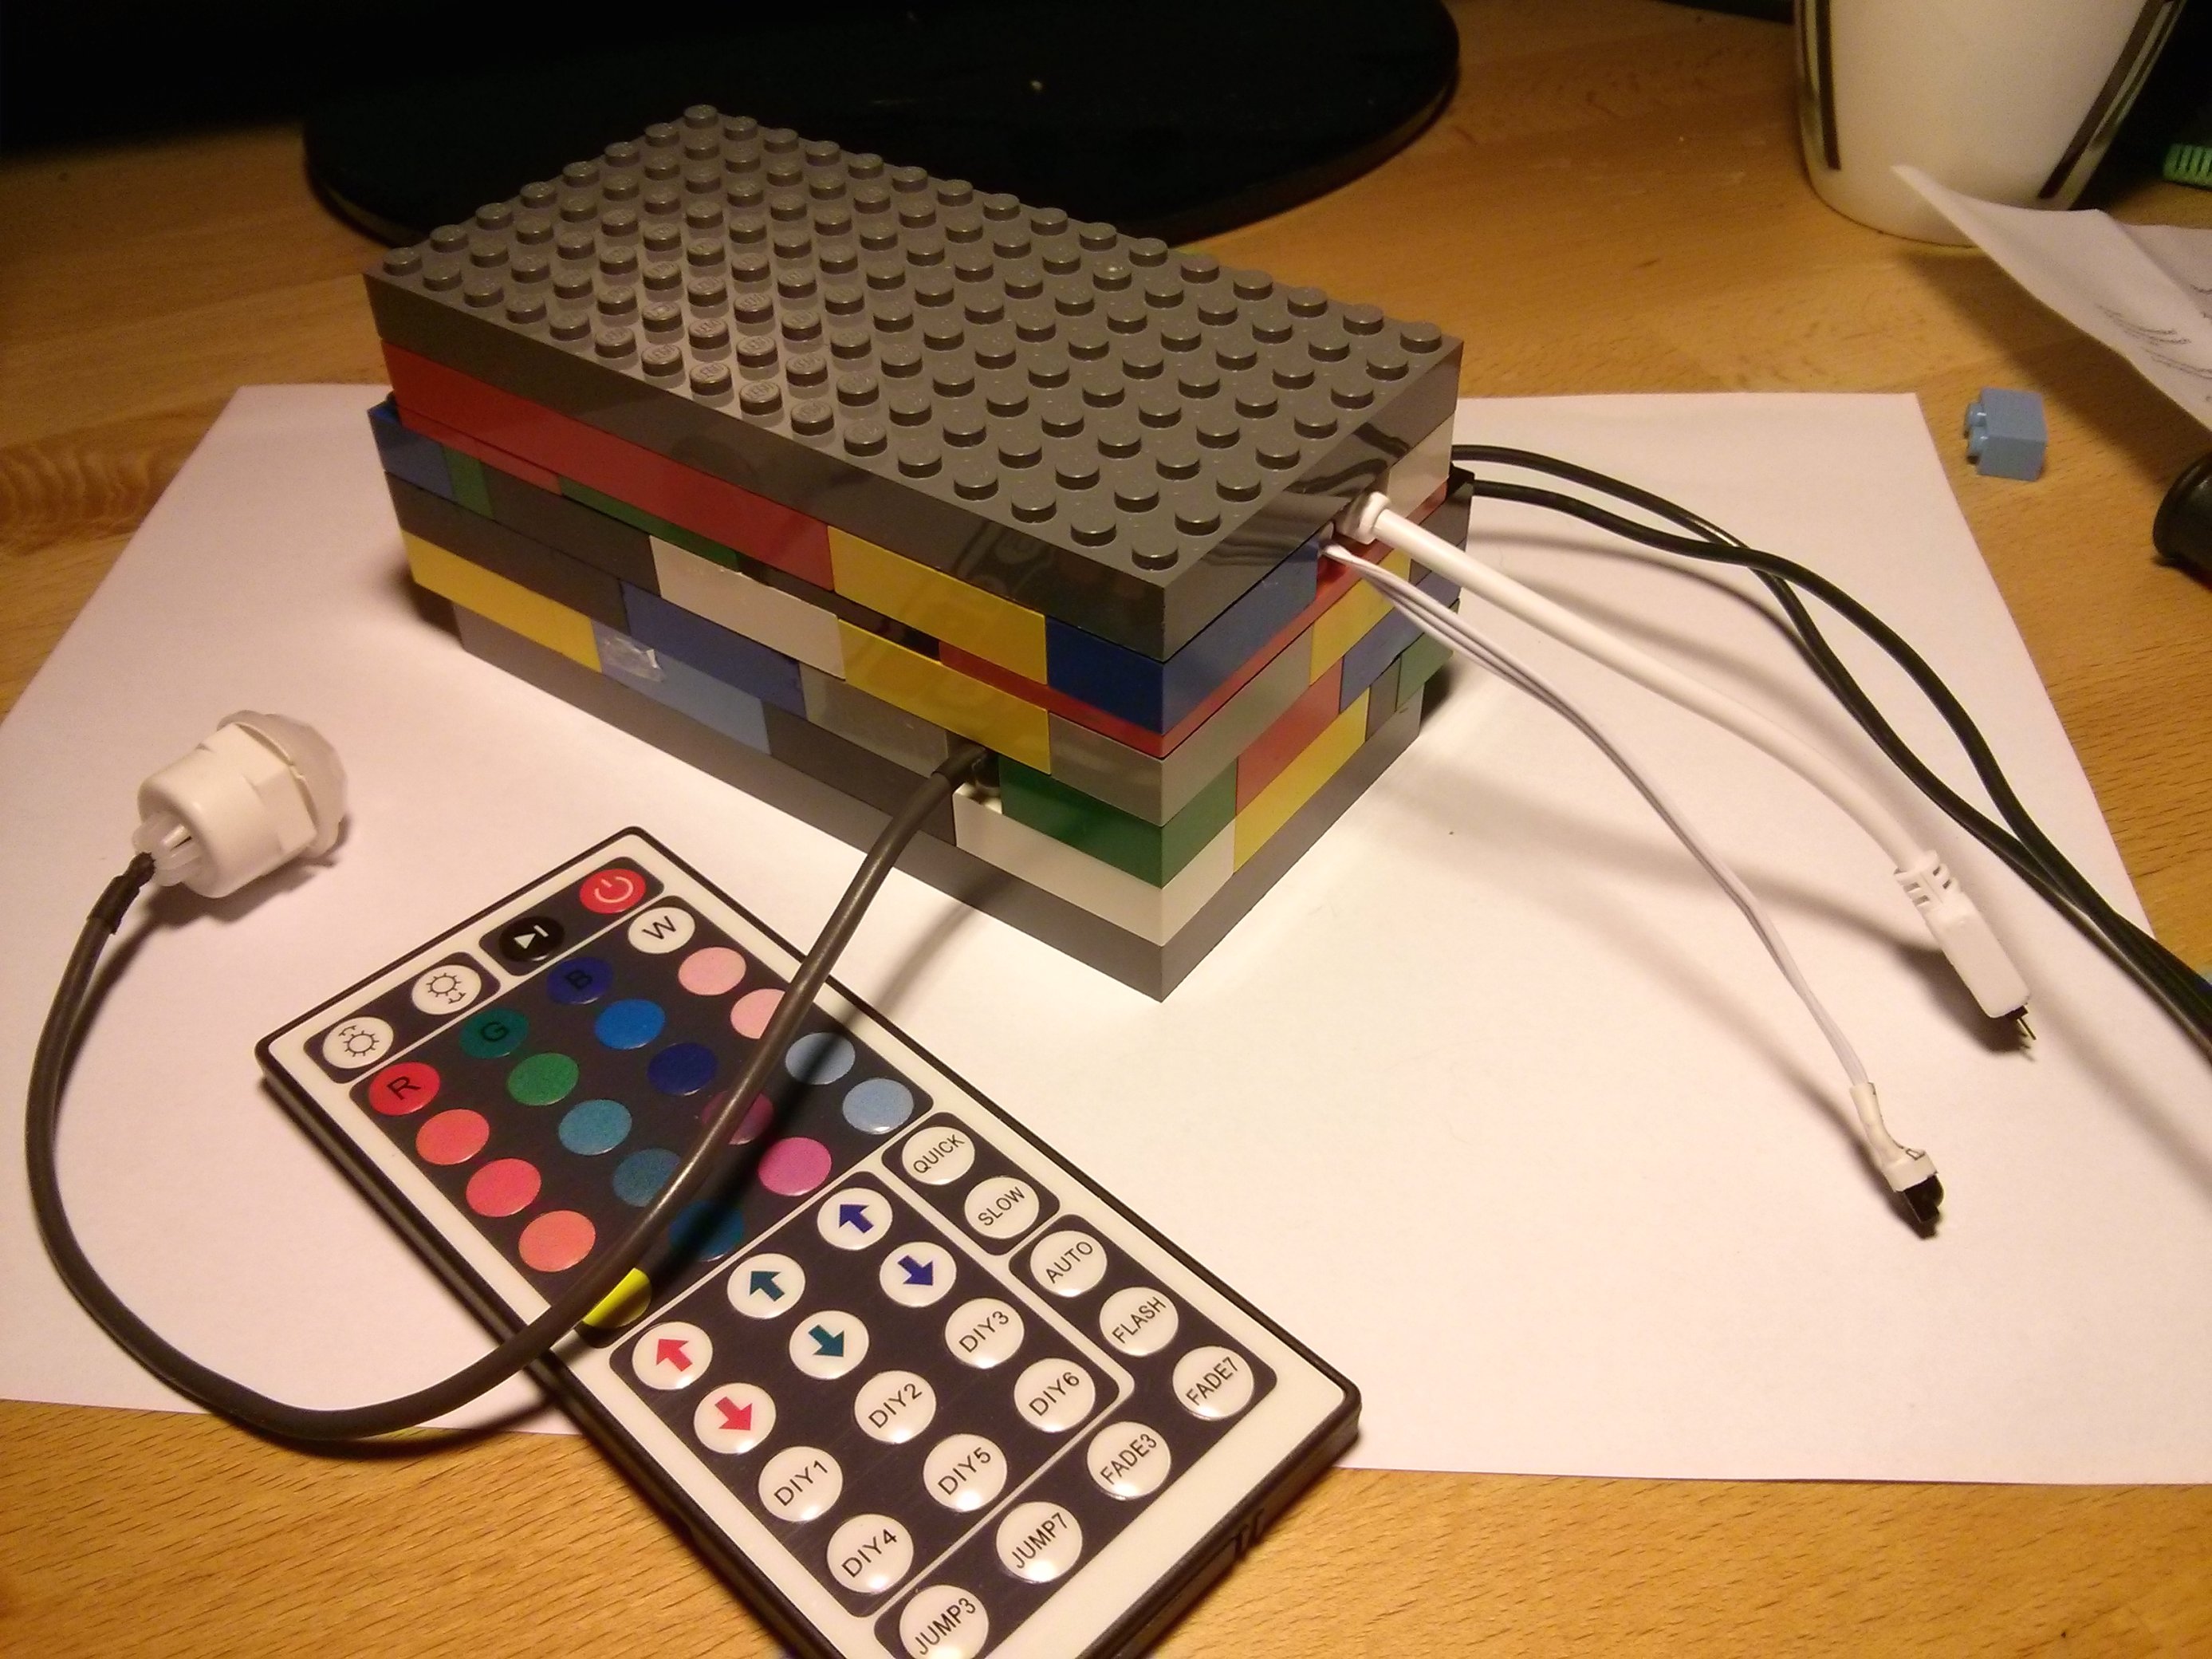
Finally, I had a brilliant idea: using every DIY’er favorite tool for quick’n’dirty builds: Legos!
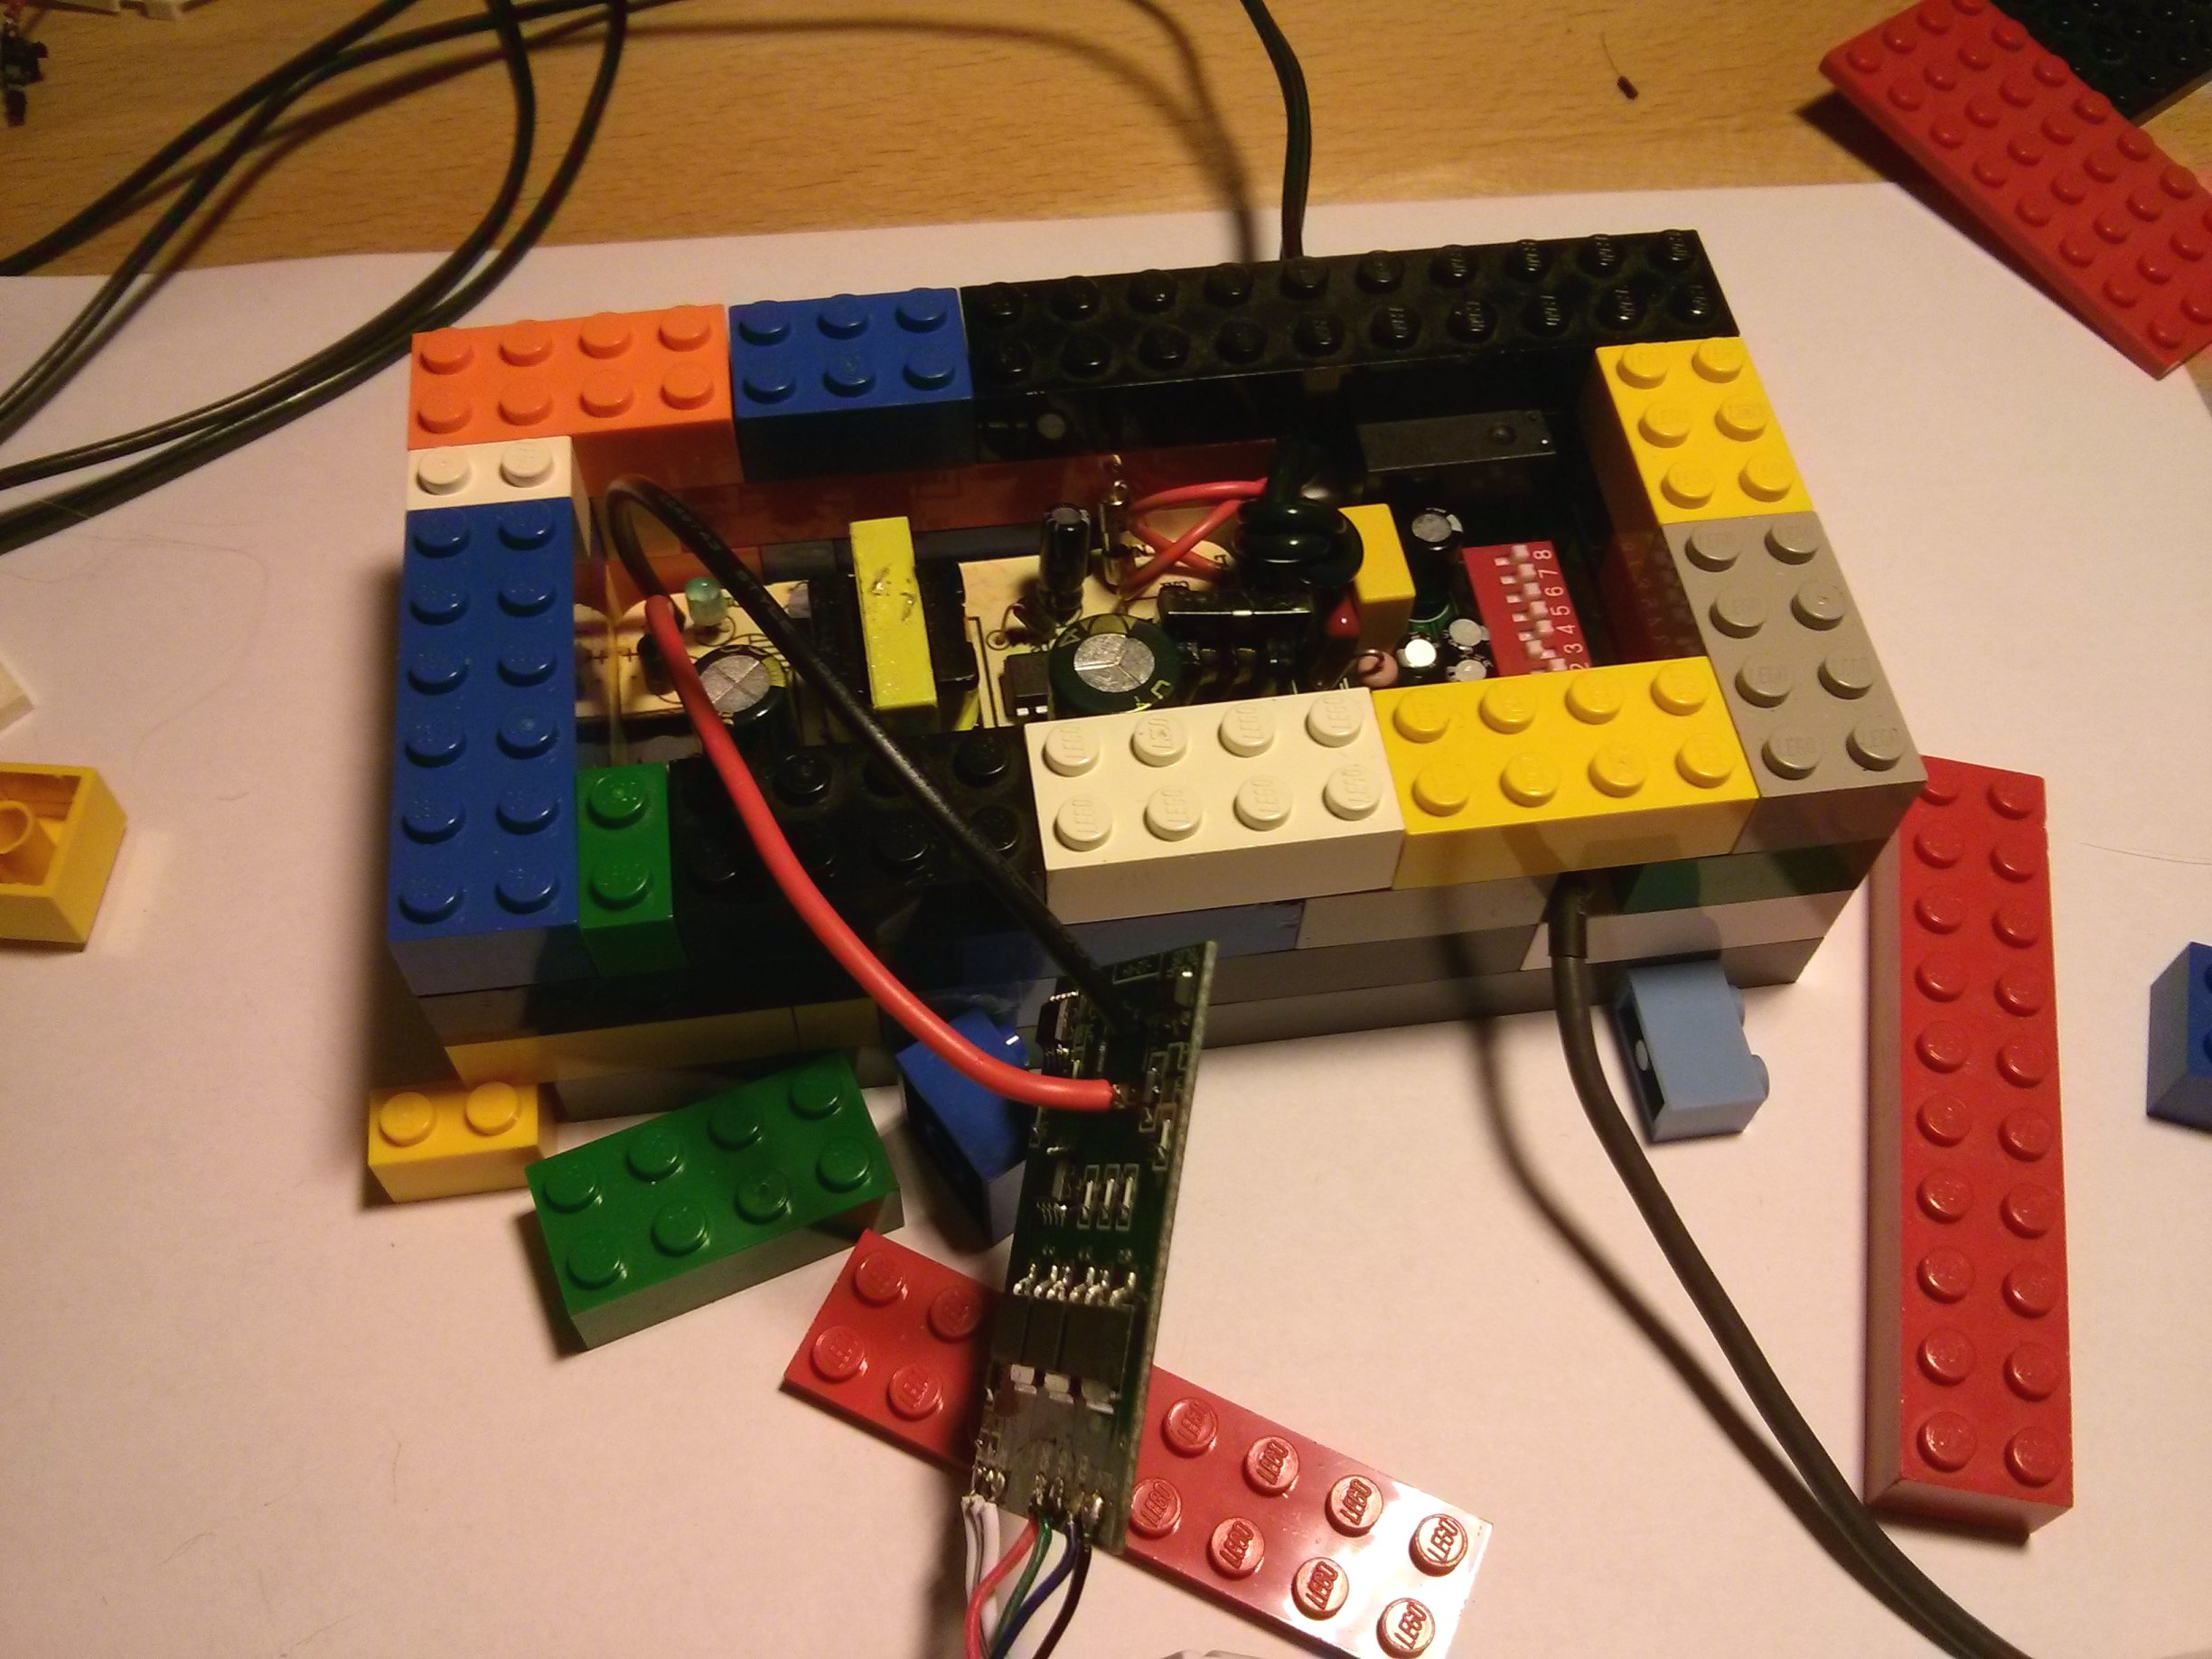
Legos are the perfect prototyping platform: easy to assemble and dissassemble, always available and cheap. They are also heat-tolerant enough that the temperature from the transformer and controller won’t do them any harm (the fact that packaging is not too tight certainly helps, too).
# Finished Product
After building my awesome case, it was just a matter of plugin everything in and mounting the LED strip.
This item has not yet been unlocked…
 unlocked!
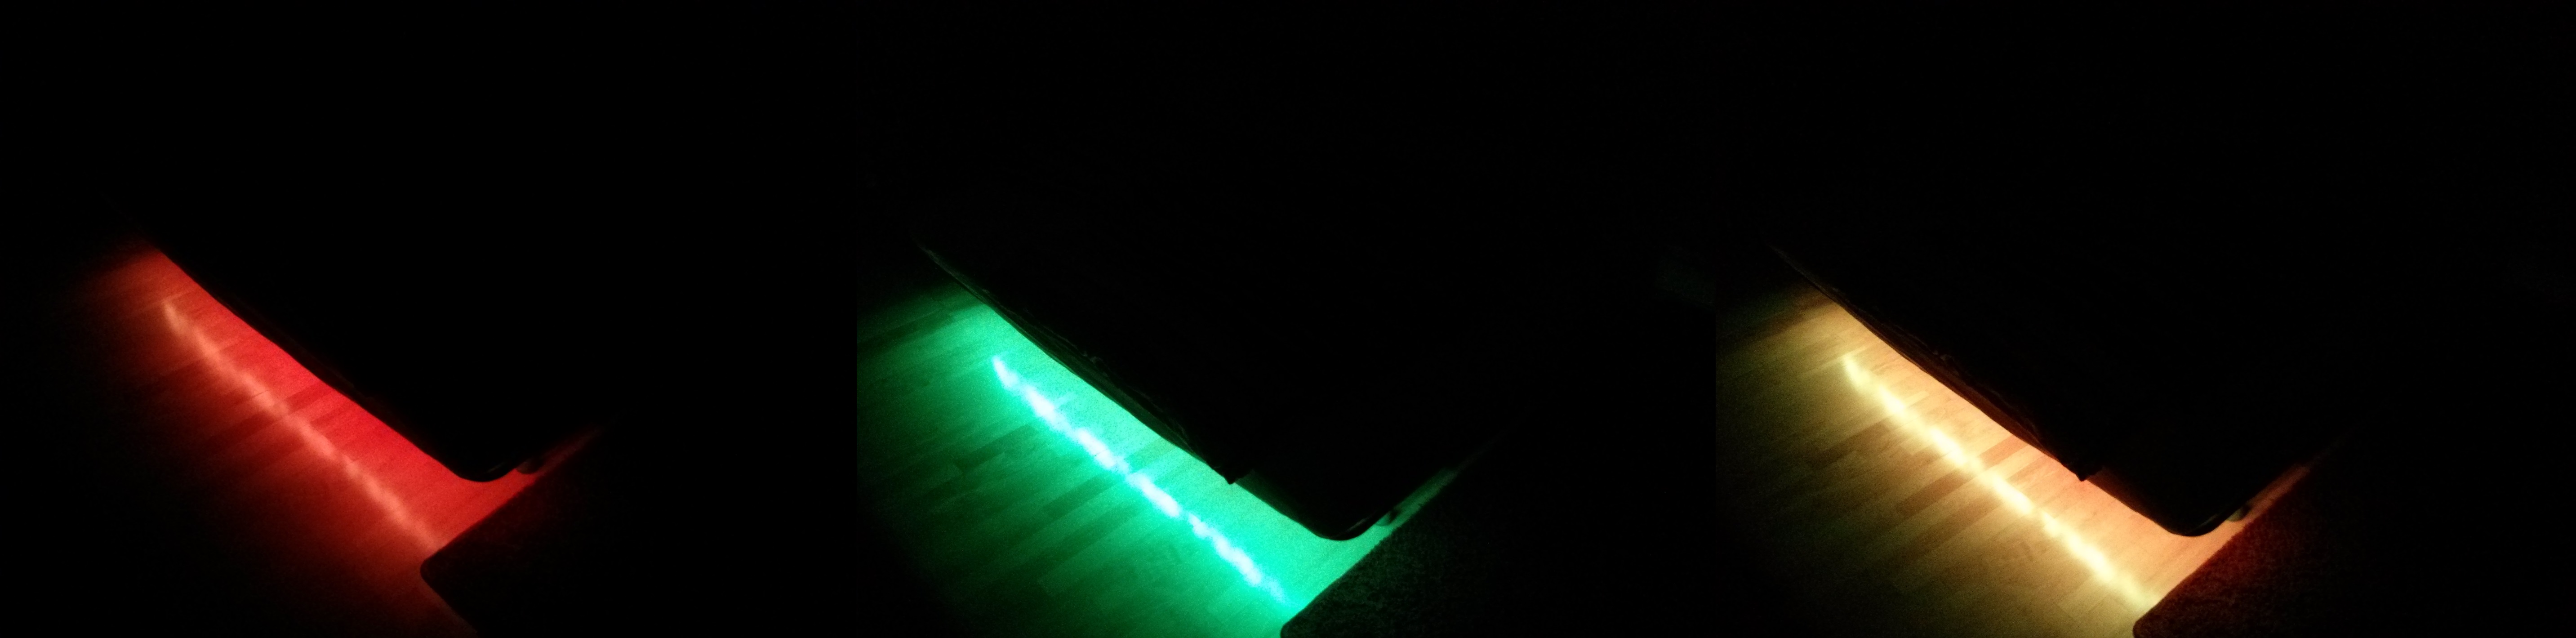
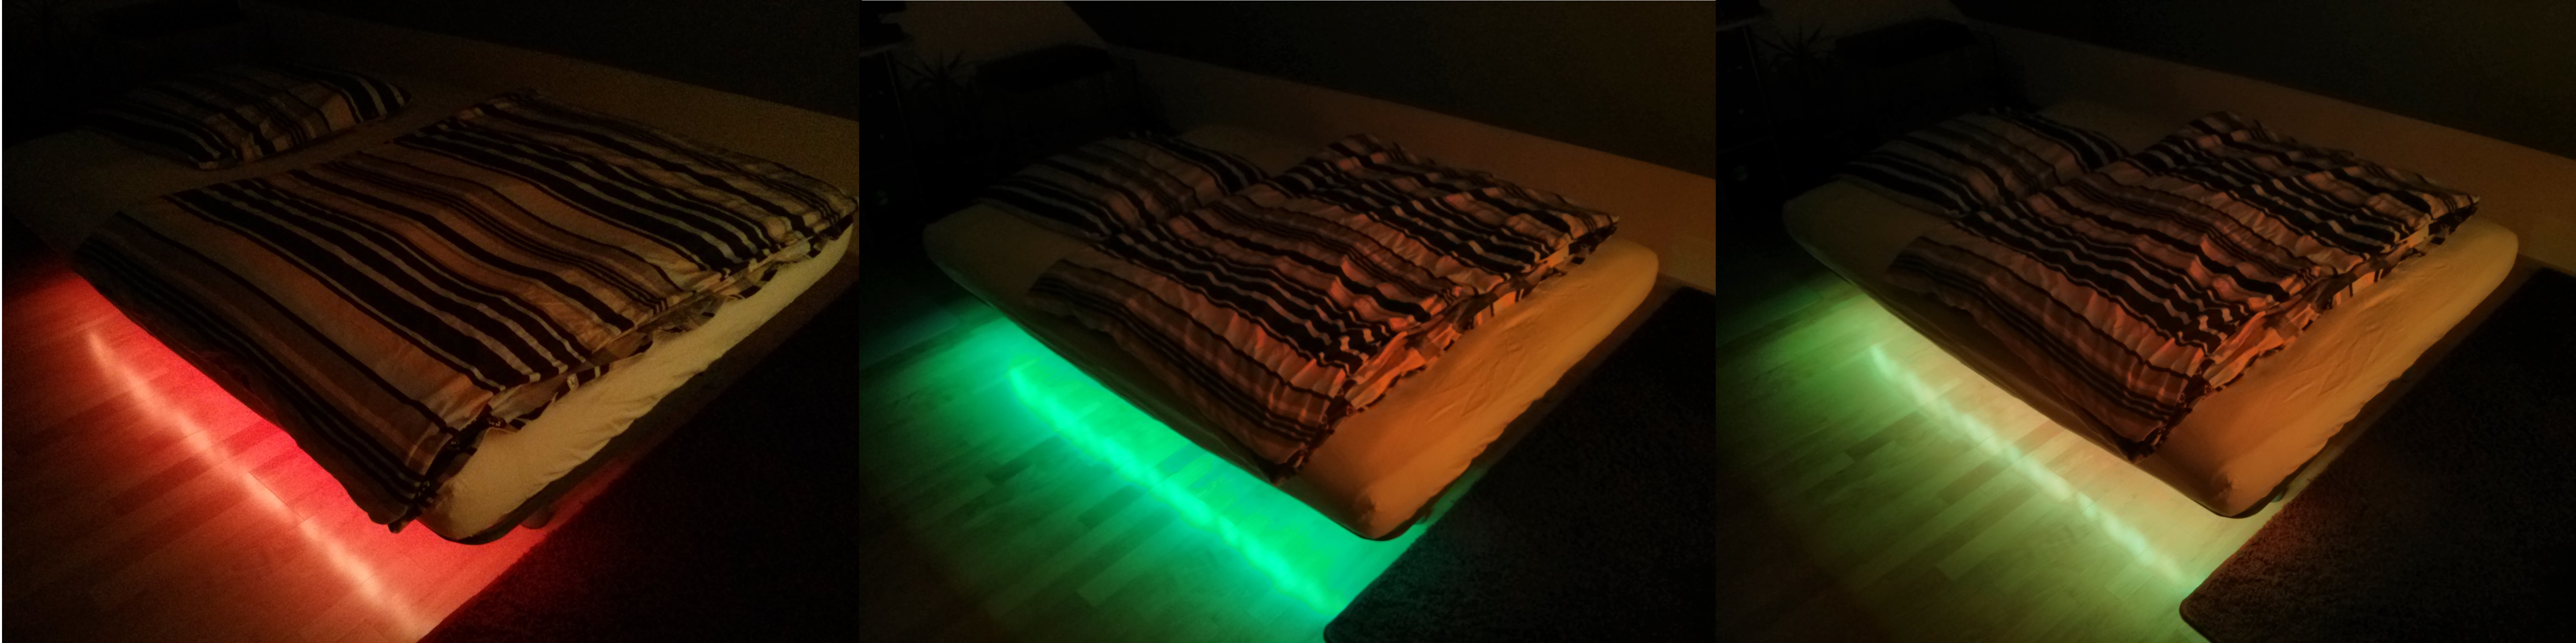
I installed this kit under my bed, that way when I get up at night, the light (under the bed) automagically turns on. Having an RGB strip is a nice feature, but I generally set it to a kind of warm white tone. However, when you’re having friends over rainbow colors are certainly way color than just plain white.