Continuous Blog Deployment: Self Hosted Edition
Initially, I wanted to run my blog from a single LXC container, set up with a web server, a static-site generator and my editor. The idea behind this was to be able to log in via SSH from anywhere remotely, write a blog post and directly publish it. This would have had the advantage of only maintaining a single instance of the blog. The clients (i.e. my computers) would not need to have any kind of local setup (web server, site generator, editor), apart from an SSH client.
However, that turned out to be too inflexible. It had flaws like reliyng on a (stable) internet connection (which one might not have when traveling by train, like I’m doing right now, for example) and also required the local network provider to not have insane restrictions like HTTP-only traffic.
Then I came up with another approach: Continuous Deployment is the new hot topic after Continuous Delivery and Continuous Integration (CI) in the DevOps world (and software development in general).
Brief definition:
- Continuous refers to doing the steps below constantly, either on each commit or at least with each tag / release
- Continuous Integration describes the constant testing of software (continuously running integration tests)
- Continuous Delivery describes the constant building, packaging and publishing of software (hopefully after CI)
- Continuous Deployment describes the installation of continuously delivered software to production machines, such as servers or end user devices
The important part here is the automation of it all: software was tested, built and installed previously, too – but to continuously do these tasks they must be automated entirely.
As there is no “testing” step for creating a blog post (apart from syntax checks maybe), the build pipeline looks as follows:
- Push Git commit to repository
- Build the static site
- Push to a web host
# Selfhosting
There are many approaches already documented online. The most common one is probably Github Pages with Jekyll or building with Travis CI. However, I want to have the entire setup under control, therefore I’m choosing an entirely selfhosted approach. Another important factor is learning: I always enjoy expanding my knowledge and you just won’t get that by using a hosted service.
# Git
I’m using Gitea as my Git server and web interface for my blog.
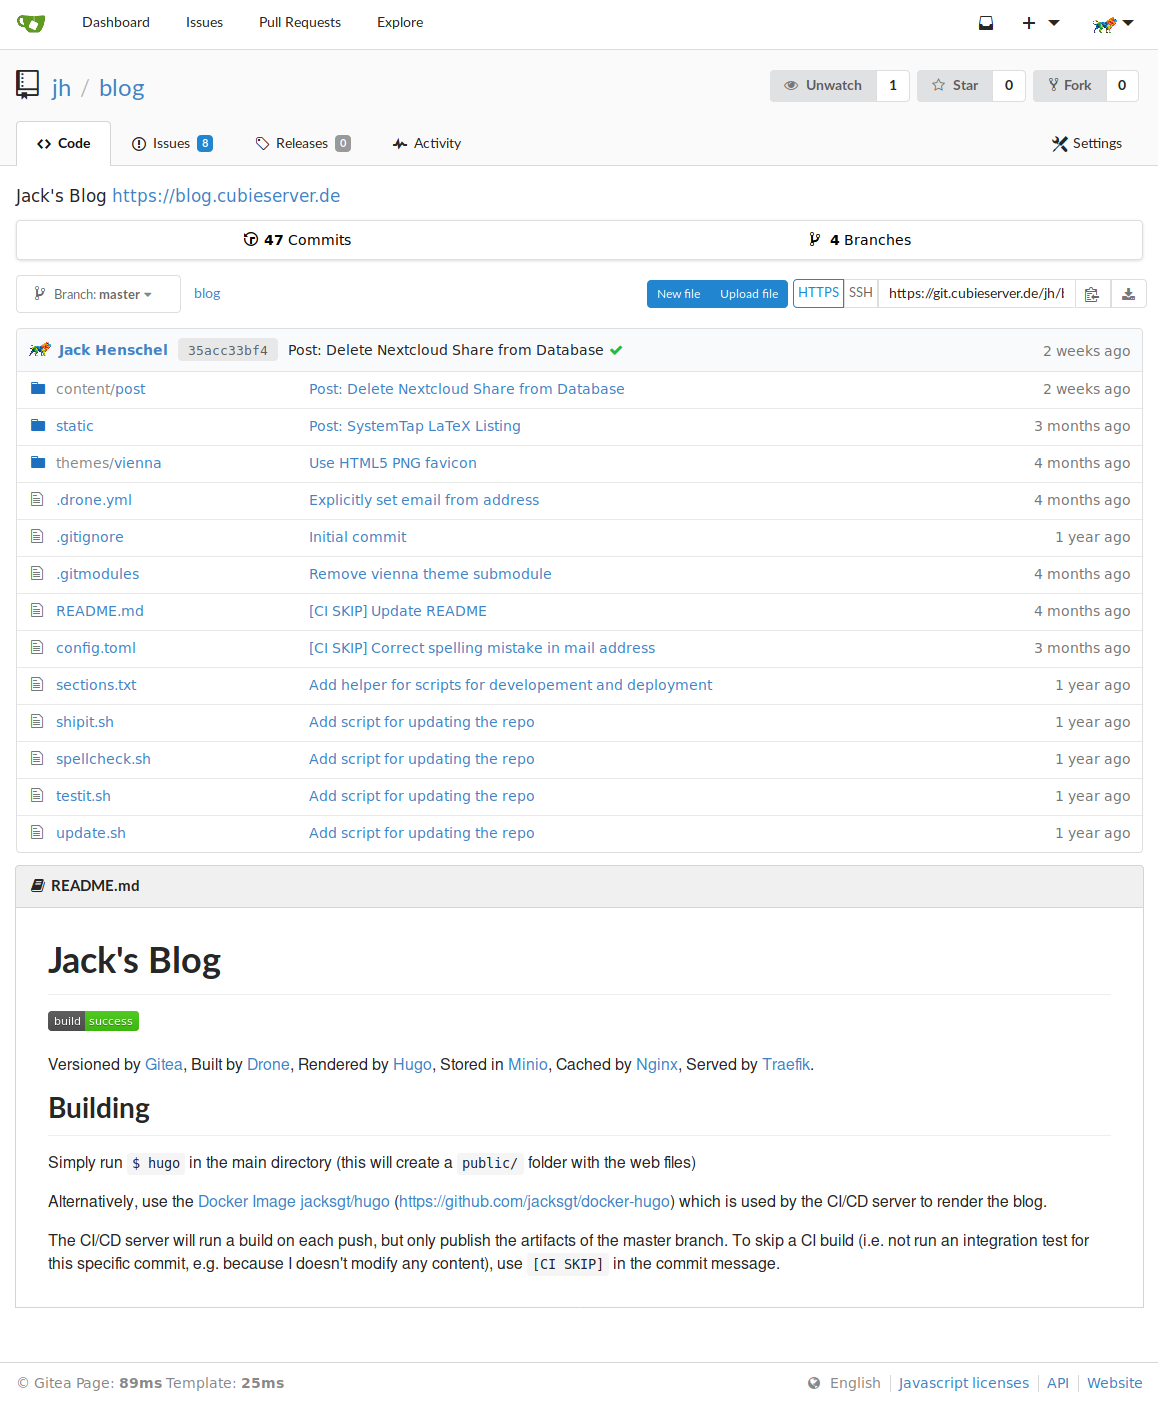
Gitea not only offers a pretty Web UI, but also integrates nicely with Drone, my build server, via automatic webhooks. This means after a Git push Gitea makes an HTTP request to Drone, thus the build server does not need to constantly poll the Git server.
Having a nice graphical web interface for my Git server means I can also use some of Gitea’s additional features. For instance, I’m using the issues the quickly write down ideas for blog posts I have throughout the day. Right now I’m also trying to use the new time tracking feature for issues, but I’ll have to see how practical and useful that actually is for me. (Update from future self: this did not turn out to be useful, as I always forget to start/stop the timer. Oh well.)
If I wanted to and was in a hurry, I could even edit the source files for my blog directly via Gitea’s integrated web editor. Though then I’m seriously missing my beloved Emacs keybindings.
# Build Server
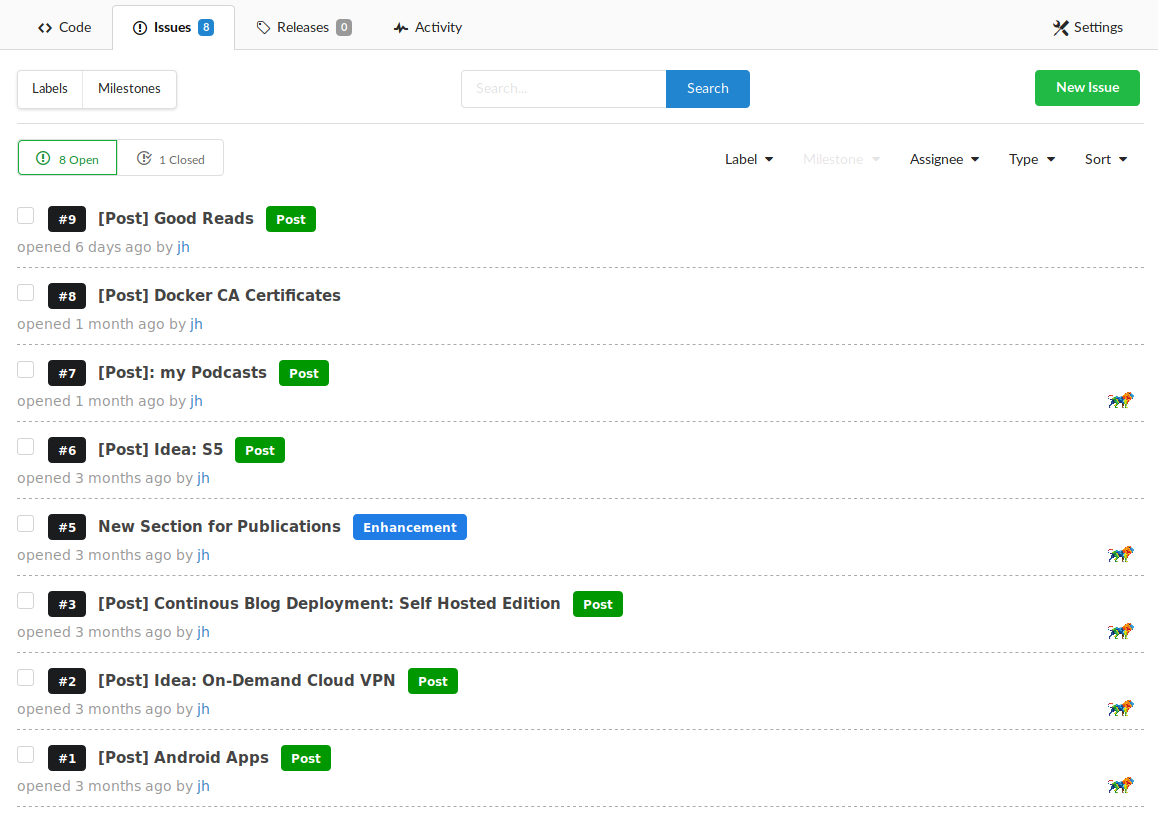
As I already mentioned, I’m using the Drone build server.
Apart from adhering to the Pipeline-as-Code principal (which basically means having a file inside of your repository which specifies the pipeline execution), it has the interesting concept of executing every single pipeline step inside a Docker container.
Drone goes so far that even the initial Git checkout is just a Docker container.
At first, this may seem overkill, but it actually makes the entire pipeline extremely flexible, as not only the pipeline itself but also the execution environment can controlled via the .drone.yaml configuration file.
I’m a real fan of this concept.
Drone’s web interface is rather minimalist and conveys exactly the information it needs to - in that sense it is the exact opposite of Jenkins (though Jenkins has made very good progress with Blue Ocean).
The entire pipeline is configured in the .drone.yaml file:
| |
There are three build steps, excluding the initial Git clone which Drone adds automatically.
The build step runs a Docker container containing Hugo, the static site generator I’m using. It’s super fast and very comprehensive.
As it’s written in Go, it can easily be compiled into a static binary which results in a tiny Docker image.
This step is executed on each push to the source repository.
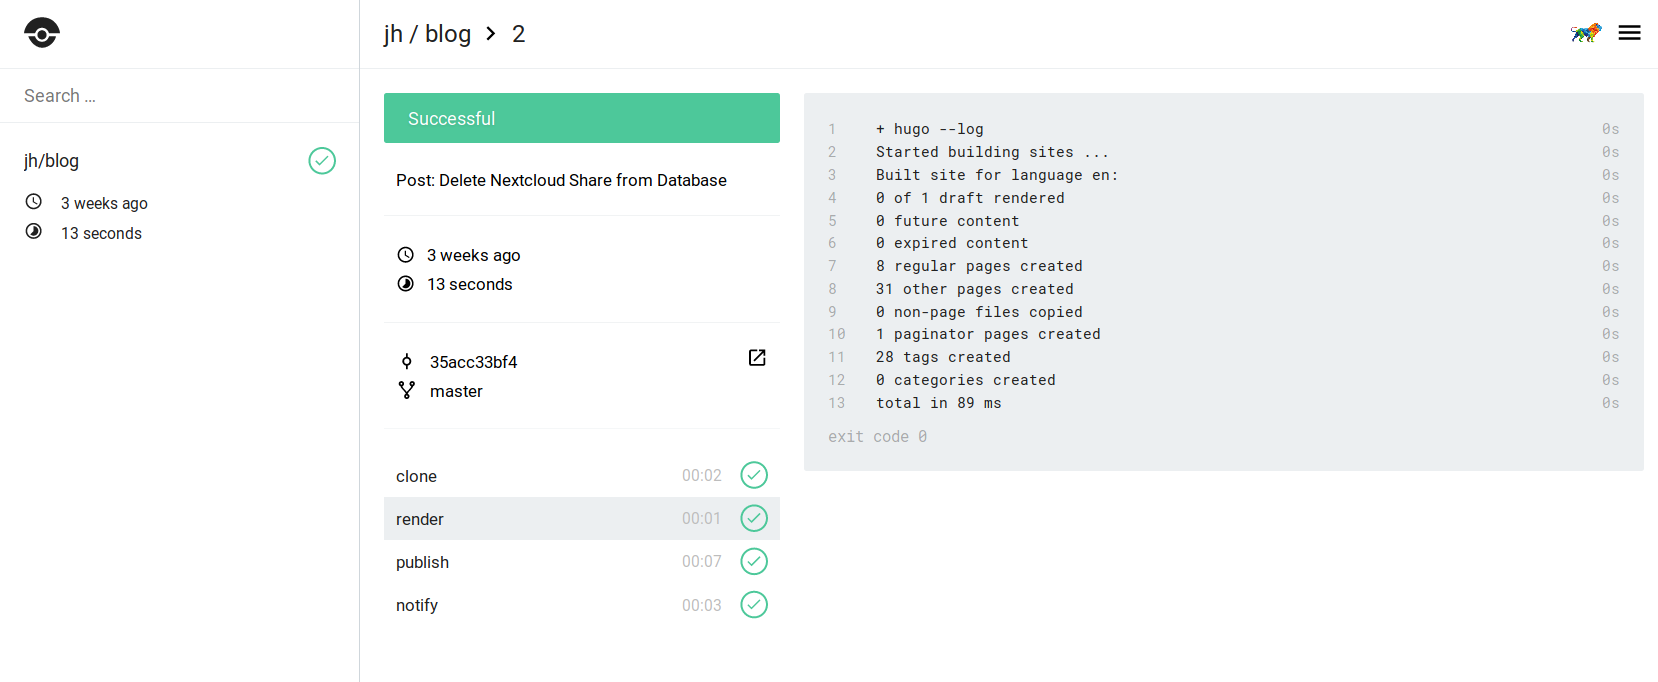
Next, the publish step pushes the static files from the public/ directory to the object store, for which I’m using Minio as it offers an S3-compatible API (but the path_style options needs to be set to true).
Most importantly, this step only gets executed when the push happened on the master branch.
Otherwise, any pushes (also to development branches) would result in overwriting the website content.
For more information about various options, refer to Drone’s S3 plugin documentation.
Finally, there is a notification step which is always executed (no matter if the build failed or not) and sends me an email about the build status. This is where the ‘Container Native approach’ of Drone gets kind of weird (speak: unfamiliar), as other build servers provide this out of the box, but with Drone you have to configure it yourself. But, this offers tremendous flexibility for what notification service you want to use. Drone has plugins for most of the common messaging services, but if you want to do something crazy (like notifications via a AMQP, MQTT or SMS), just build a Docker image for it and off you go - awesome!
Because you don’t want everyone who has access to the source code repository to see your service credentials, Drone supports the notion of ‘secrets’. These secrets are added either via the Web UI or the CLI tool and are only available to Docker containers at runtime.

# Object Storage
There are many object stores out there, but Amazon’s S3 is by far the most widely known and best integrated. Luckily, Minio provides an almost compatible API, enabling me to host my own S3-like service.
Setting up a Minio instance is trivial, just supply their Docker image with environment variables for access keys (“username”) and secret keys (“password”), expose the service to the internet (ideally via HTTPS by using a reverse proxy) and you are all set.
# Web Server
Since Minio can’t natively serve bucket contents as web pages, I’m using Nginx as a proxy and cache for my Minio buckets. Decoupling data storage from serving data also offers benefits in terms of orchestration flexibility. For instance, it allows me on the one hand to schedule the Nginx service on hosts with a fast network connection and minimal storage requirements, the Minio service on the other hand can run on a host with moderate bandwidth requirements and plentiful storage.
Now I only need to implement the caching part for Nginx…
My nginx.conf looks like this for routing a domain to a Minio bucket and caching the contents:
| |
The caching and serving “stale” content allows Nginx (through the proxy_cache_use_stale directive) to deliver the website even when the object store is offline or is being updated (you can test this by browsing your site a bit, then taking down the backend and visiting the same pages again).
I have set the default expiration time for valid content to one hour (proxy_cache_valid 200 1h;).
Also, I am stripping some headers from Minio’s response, as those are not relevant to the user (proxy_hide_header).
For more information on what the above configuration means and how you can fine tune it, see this excellent “Guide to Caching with Nginx” as well as the documentation on the ngx_http_proxy module.
Since I added an additional header indicating the status of the cache, we can easily test if the setup works by issuing two subsequent requests:
$ curl -I https://blog.cubieserver.de
HTTP/2 200
accept-ranges: bytes
content-type: text/html; charset=utf-8
date: Sun, 15 Apr 2018 16:38:09 GMT
etag: "1084cfa111c7cf3433aa269dfbc040b4"
last-modified: Sat, 31 Mar 2018 14:07:31 GMT
server: nginx
vary: Accept-Encoding
vary: Origin
x-proxy-cache: MISS
content-length: 12932

$ curl -I https://blog.cubieserver.de
HTTP/2 200
...
x-proxy-cache: HIT
Great, that looks good!
# Infrastructure / Orchestration
All of the services mentioned above run in a Docker Swarm cluster and are tied together by Traefik, “a modern HTTP reverse proxy and load balancer made to deploy microservices with ease”.
Traefik can automatically configure itself by looking at the Labels of running Docker services and route traffic appropriately.
My Swarm Stack is configured with the following docker-compose.yaml:
| |
That’s quite a mouthful, but it sets up pretty much all of the services. The only service is the Drone agent (build slave), but since it’s potentially running on multiple other hosts, I’m simply deploying it with the following command:
docker service create \
    --detach \
    --name drone-agent \
    --stop-signal SIGINT \
    --replicas 2 \
    --mount "source=/var/run/docker.sock,target=/var/run/docker.sock,type=bind" \
    -e DRONE_SERVER=drone.cubieserver.de:9000 \
    -e DRONE_SECRET=foobar \
    "drone/agent:0.8.4" \
    agent
The Drone agent then connects to the Drone server (hence it requires the address DRONE_SERVER as well as the authentication token DRONE_SECRET), fetches the required Docker images for executing a pipeline and runs the Docker container with the assigned commands.
# Conclusion
For now I’m very content with my setup. It fits my needs, is flexible (i.e. I can easily swap out any of the components) and I learned a lot in the process of creating it.

Of course, the next step is moving to FaaS - err, I mean “serverless” – may the quest continue!
# Thank you Free, Open Source Software!
I want to thank especially the contributors of the projects mentioned above, but also anyone in general who is participating in open source development, whether you’re hacking on software, writing documentation, tackling issues or translating user interfaces. Without you, this journey would have never been possible.
Thanks for making the world a better place, everyday, step by step.