Complete guide to Nextcloud OIDC authentication with Authentik
After migrating my user accounts from OpenLDAP to Authentik, I still need to switch the Nextcloud authentication to a modern protocol, instead of relying on Authentik’s built-in LDAP outpost (which emulates an LDAP server). In a previous post a couple of months ago I explored how to connect the Nextcloud file-hosting suite to the Authentik identity provider with SAML. I managed to get the setup working, but in the end I was neither satisfied with the solution nor convinced by its long-term maintenance. For reference, at this point I have been running Nextcloud with the LDAP user backend for six years, and it want any solution that is going to replace this setup to last at least that long, too.
Hence, in this post I am going through the setup of Nextcloud with OIDC to connect to Authentik. Specifically, I will go over the following aspects:
- What is OIDC?
- Which options are available for using OIDC with Nextcloud?
- Authentik setup
- Nextcloud setup
- Advanced login and logout behavior
- Conclusion
# OIDC
OpenID Connect (or OIDC for short) is an identity layer based on the more extensive OAuth2 authorization framework. Whereas OAuth2 can handle many different authentication and authorization functions, OIDC is a trimmed down version that focuses on one aspect: user identification. Applications can use OIDC to authenticate a user (i.e. verify the identity of a user) and retrieve metadata about the user (name, email address etc.), but at the same time can use their own internal authorization mechanisms (i.e. what the user has access to). JSON Web Tokens (JWT) are most commonly used to exchange authentic (meaning: signed and verified) information about a user.
In an OIDC authentication flow, there are generally three parties:
- the subject (the end user)
- the identity provider or token issuer (in my case this will be Authentik)
- the relying party (the secure application, here: Nextcloud)
If you want to learn more about it, I recommend looking into this excellent quickstart guide to OIDC.
OIDC is seeing widespread adoption these days by many different types of applications. In fact, OIDC is what most of the popular “Social Login” methods are based on (e.g. “Login with Google/Apple/…").
# Options
After establishing that OIDC looks like a solid and future proof authentication protocol, let’s take a look at the options we have for integrating it with Nextcloud.
There are no less than three plugins for Nextcloud that provide some sort of OIDC integration:
- Social Login: focuses mainly on Google/Amazon/… identity providers, but since all of these are based OIDC internally, also custom providers can be used. The plugin is actively maintained, but unfortunately just by a single developer.
- Nextcloud OIDC Login: a polished and well-documented plugin that unfortunately is in maintenance-only mode due to lack of developers.
- user_oidc: least polished, but located under the
github.com/nextcloudorganization and seemingly maintained by Nextcloud developers.
# user_oidc
Out of the three options presented above, I decided to give user_oidc a try, simply because I’m hoping that it’s used by many enterprises and will therefore be supported for a long time by the Nextcloud developers (we’ll see how this bet turns out in a couple of years - fingers crossed). If it wasn’t for the state of maintenance, I would have opted for Nextcloud OIDC Login.
Before we get to deep into the technical details, I should mention that user_oidc currently does not support group provisioning for users - if this is something that is required for your setup, you should check out one of the alternatives.
However, work is in progress to address this shortcoming.
Another (slightly) negative aspect about user_oidc is the confusing configuration: as the following sections will show, some settings are configured via the Web UI, some via the occ CLI, others via Nextcloud’s config.php. In the end it works, but this aspect is handled much more consistently in the other plugins mentioned before.
In the next sections, we’ll first look at the configuration required on the Authentik side and then on the Nextcloud side.
# Authentik
Since OIDC describes a trust relationship between the identity provider (Authentik) and the relying party (Nextcloud), we need to let Authentik know about the new application it should handle authentication for.
To do this, log into your Authentik instance as an administrator and switch to the “Admin interface” (the button in the top-right corner).
Go to the Applications menu and click on Create:
Authentik ‘Application’ Creation Menu
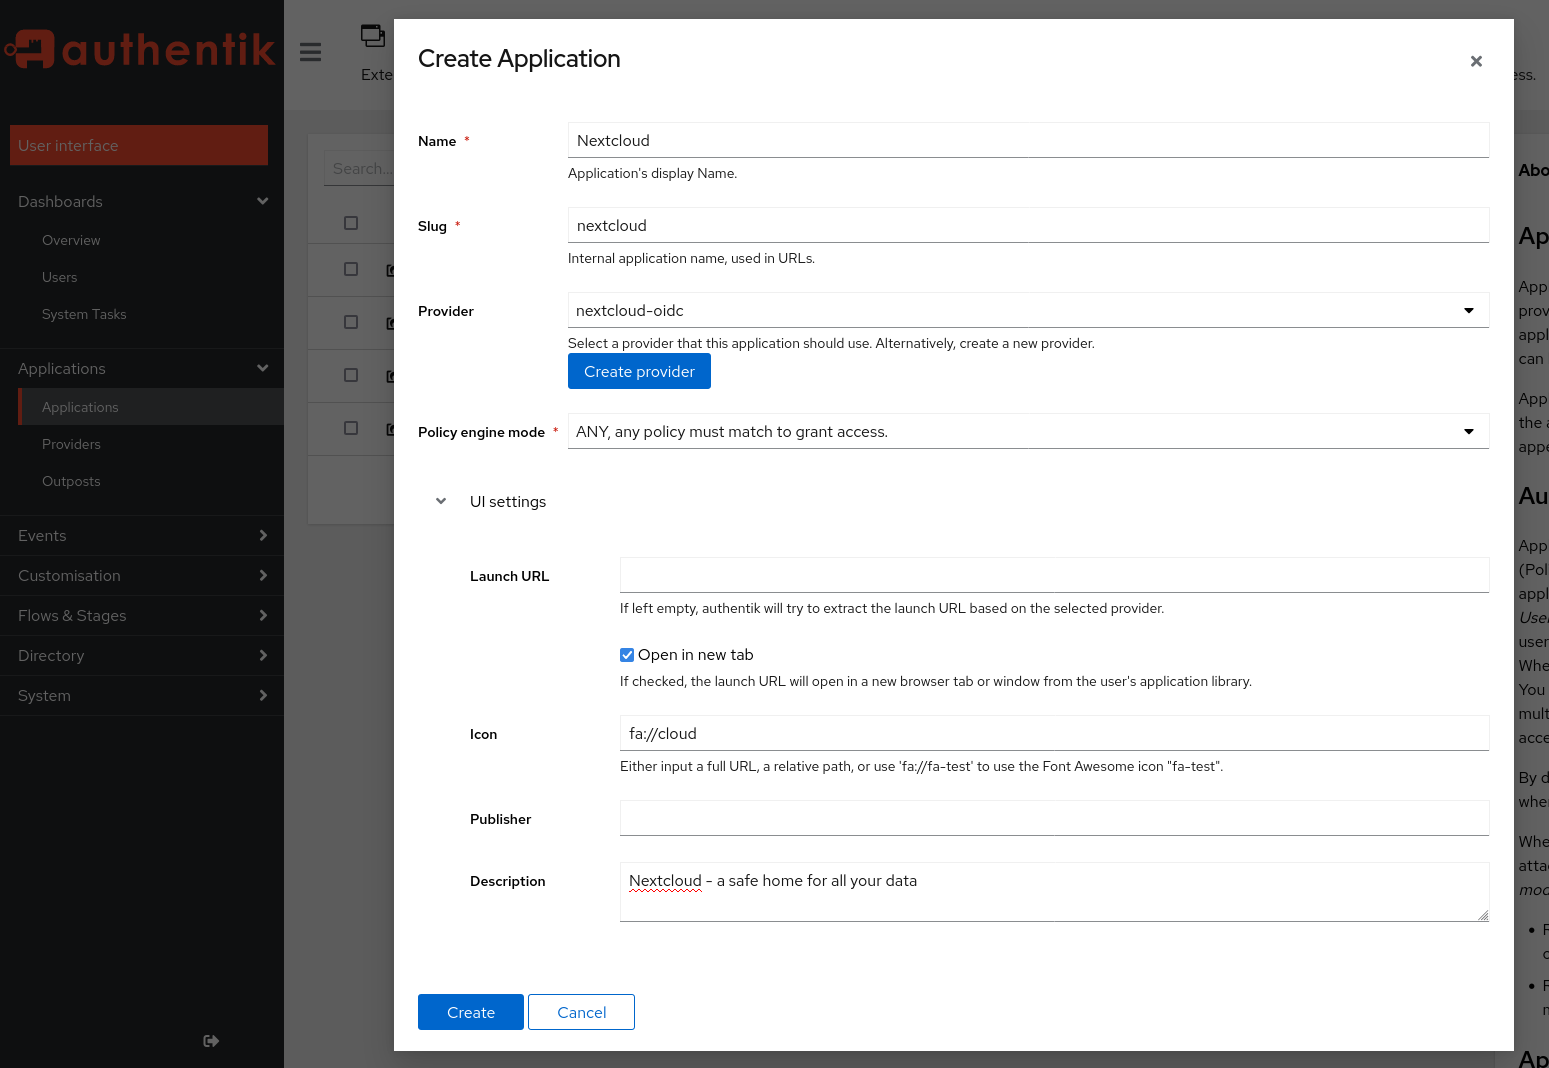
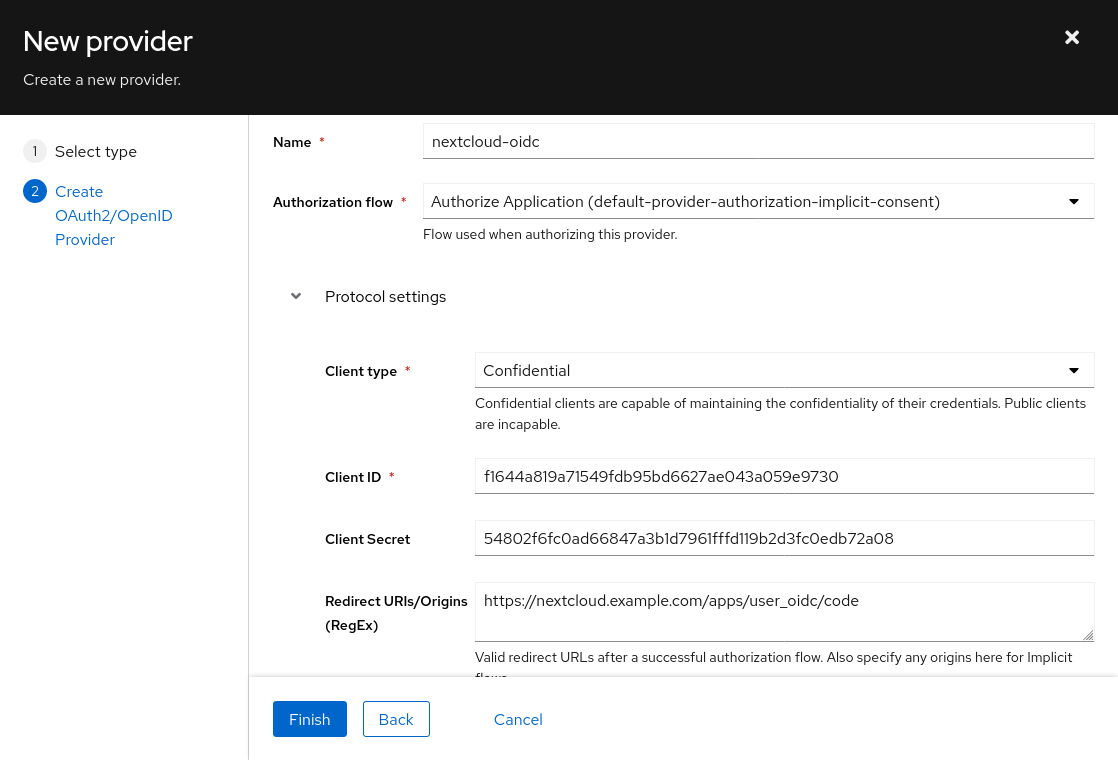
Click on the Create Provider button and fill the menu (shown below) with following settings:
- Type: Oauth2/OIDC Provider
- Authorization flow: implicit consent (otherwise your users need to confirm each login explicitly!)
- Client type: Confidential
- Client ID: (leave auto-generated value as-is)
- => copy this value for later use
- Client Secret: [IMPORTANT] trim the auto-generated value to 64 characters - there is currently a bug in user_oidc that prevents longer client secrets. A client secret of 64 chars is still sufficient from a security perspective.
- => copy this value for later use
- Redirect URIs:
https://<NEXTCLOUD-HOSTNAME>/apps/user_oidc/code - Advanced protocol settings > Subject mode: based on the username
- this setting should be used to ensure Nextcloud’s federated cloud ID will have a human-readable value, like
username@nextcloud-hostname.com.
- this setting should be used to ensure Nextcloud’s federated cloud ID will have a human-readable value, like
- Click on Finish
Authentik ‘Provider’ Creation Menu
Back in the application creation menu, click on Create.
Now switch to the “Providers” section, click on the newly created provider and copy the OpenID Configuration URL - it should look like https://<AUTHENTIK-HOSTNAME>/application/o/nextcloud/.well-known/openid-configuration.
# Nextcloud
Now we can switch to the Nextcloud instance.
To get started, simply log in to your Nextcloud instance as an administrator, navigate to the “Apps” section and search for OpenID Connect user backend, then click on Download and enable.
I’m using Nextcloud version 24 and user_oidc 1.2.1 at the time of writing.
Open the Admin Settings of Nextcloud (top-right behind the profile picture) and locate the OpenID Connect section (bottom-left corner).
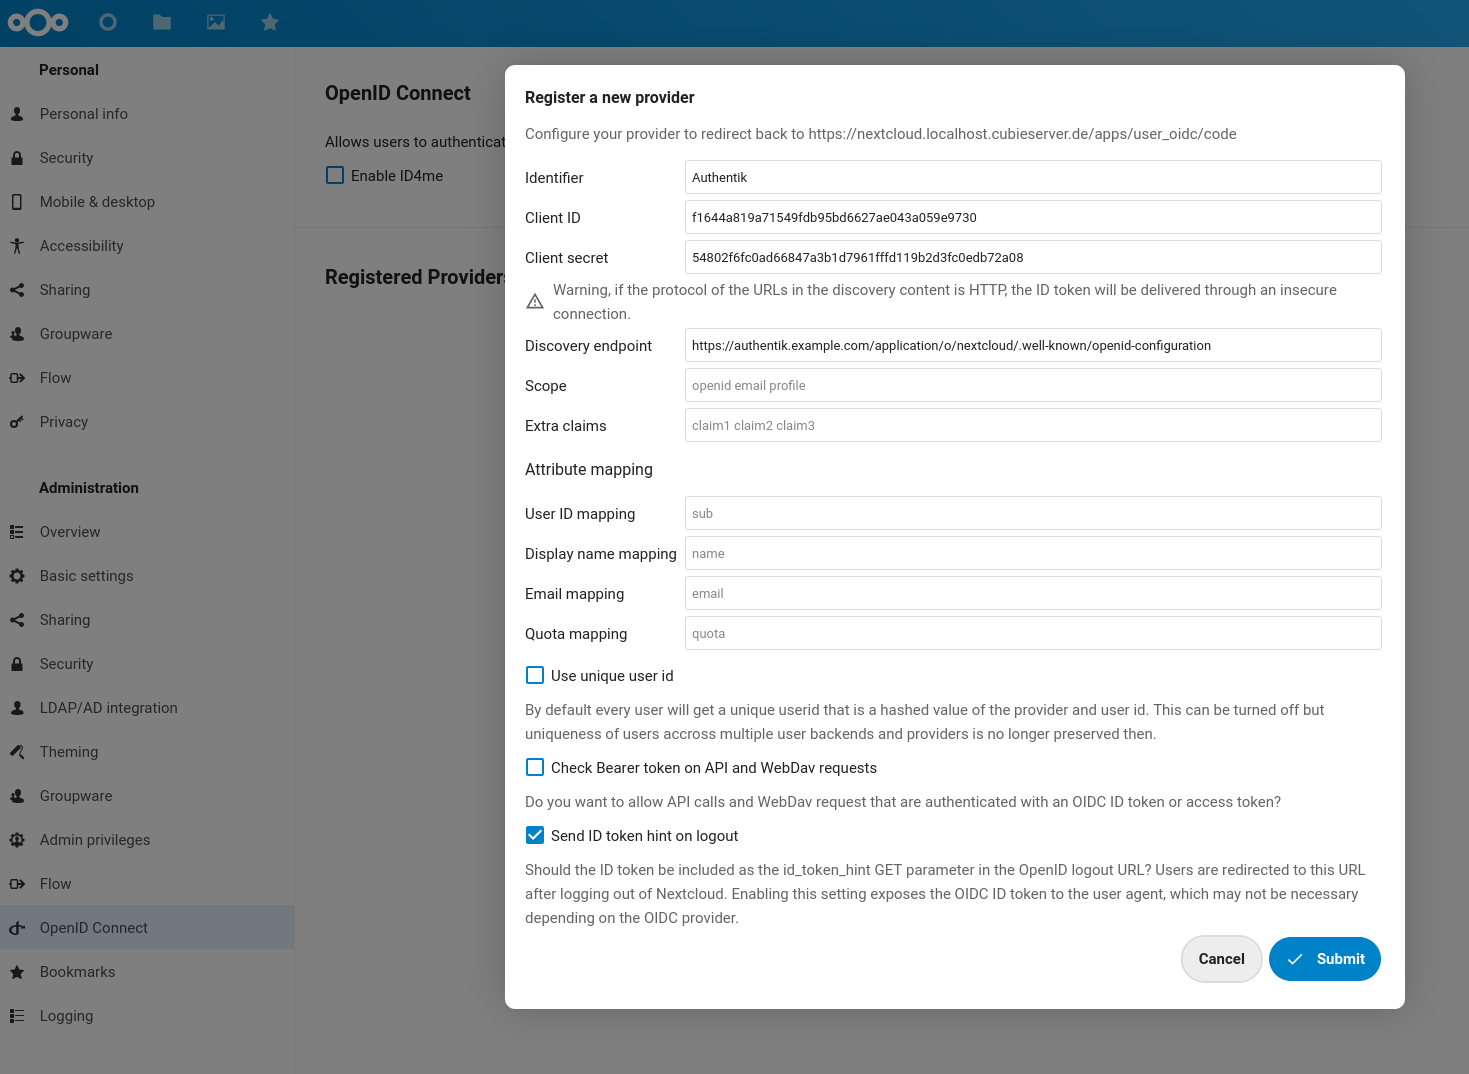
Click on the small + button next to “Registered Providers” and fill the following fields with the data obtained on the Authentik admin interface:
- Identifier:
Authentik(you may choose any value here, but it will be shown to your users in the form of aLogin with <IDENTIFIER>button) - Client ID: (value copied from Authentik)
- Client Secret: (value copied from Authentik)
- Discovery endpoint: (OpenID Configuration URL copied from Authentik, should end with
.well-known/openid-configuration) - Attribute mappings: unless you have a non-standard identity provider setup (with custom fields / attributes), the placeholder values should work and can be left as-is.
- Uncheck
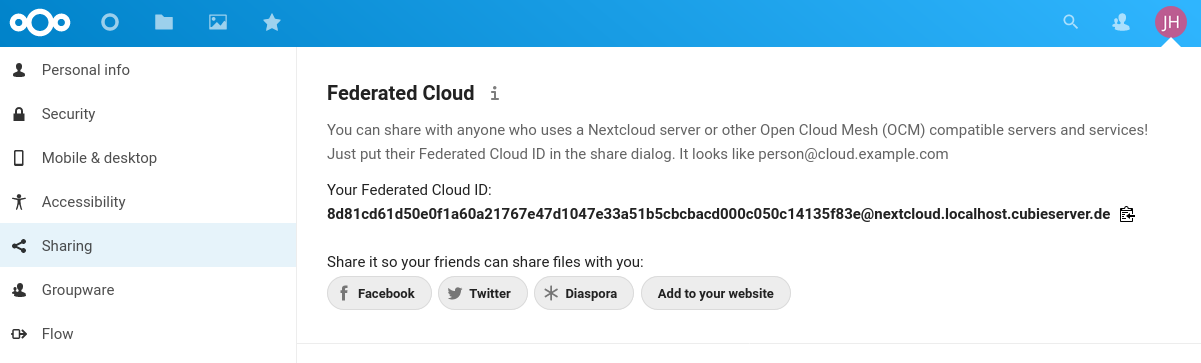
Use unique user ID- when this option is enabled, Nextcloud will use the hash (checksum) of the provider identifier + user identifier as the internal user ID. Unfortunately, this creates rather ugly and long federated cloud IDs. Unless you are using multiple OIDC providers or multiple Nextcloud user backends, I believe it’s safe to disable (untick) this option, since there can be no name collision within a single OIDC provider. - Click on Submit
Nextcloud OIDC provider configuration
Note that the same setup as described above can be achieved on the CLI with the following commands. This may be useful in case you want to automate the setup and avoid going through the manual steps in the web interface.
| |
A long federated cloud ID caused by the ‘Use unique user ID’ setting
# First try
Since all the configuration settings are in place now, it’s time for a first test. Open a new browser session / private window and navigate to your Nextcloud instance.
The short video shows that I am not able to use my credentials to log in as a regular (local) user to Nextcloud (in the same way as I could previously with the LDAP backend). That is actually desirable, because this way the authentication provider (in this case: Authentik) can take care of the entire authentication flow, including any possible password, 2-FA or MFA prompts. In addition, if the user is already logged in, there is no need to re-enter the credentials - hence this is proper Single Sign-On (not just Single-password).
When clicking on the Login with Authentik button, I get redirected to Authentik, where I can log in.
Finally, Authentik redirects me to Nextcloud (including an authentication token in the URL) and I get automatically logged in to Nextcloud.
If the Redirect URIs setting was not configured properly, an error will occur during this last step.
# Auto-login / redirect
At this point the setup is working – yay! – but still a bit confusing for users.
How are the users supposed to know that they need to click on Login with X instead of using the built-in username and password fields (especially because these seem much more inviting)?
There are two ways this can be addressed:
- 1: disabling the built-in login form by setting
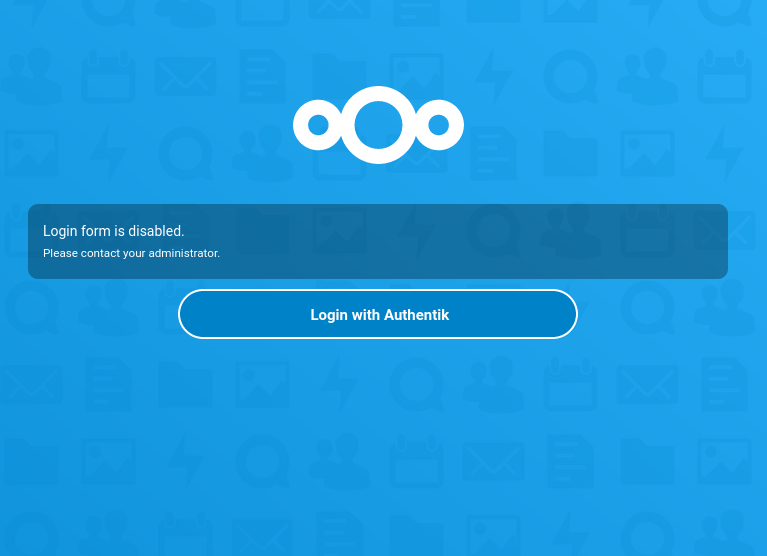
'hide_login_form' => falsein theconfig.php(see Nextcloud documentation). This will show a slightly ugly warning message on the login page, but at least it’s clear for users that they need to click on theLogin with Xbutton. The login form is just hidden, because it can still be accessed athttps://<NEXTCLOUD-HOSTNAME>/login?direct=1- this is required when you want to access Nextcloud with your local admin account.
Nextcloud with disabled login form
- 2: Making OIDC the default login method. This only works if you have just a single OIDC provider configured and no other login methods in Nextcloud (no SAML, external users etc.). With this option, any unauthenticated request to the Nextcloud instance immediately gets redirect to the authentication provider (with an HTTP Status Code
302 Foundand an appropriateLocationheader). Like in the previous case, admins can still use the regular login by appending?direct=1to the login URL. At the time of writing, this setting can only be enabled from the command line:
| |
For now, I’m sticking with the hide_login_form method, even though it requires an additional click from the user, because it’s less “automagic”.
I might switch to the automatic redirect in the future once I’m more comfortable with the setup.
# Advanced logout
The user_oidc plugin provides two options for customizing how the logout is handled.
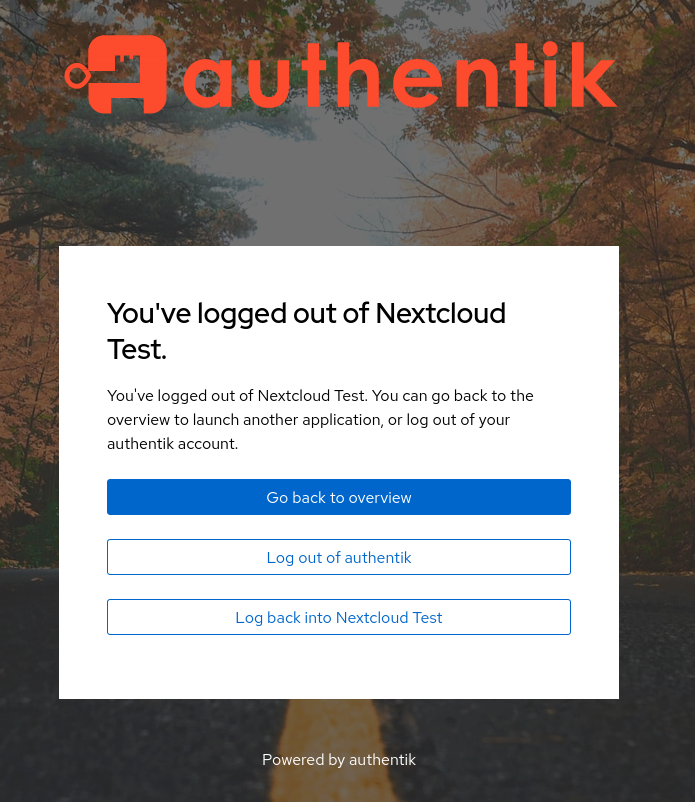
The first one is single logout: if this option is enabled (which it is by default), the user is also logged out of the entire SSO session (instead of just Nextcloud). However, Authentik will still ask the user if they want to log out of their SSO session, therefore we can leave this setting as-is.
Single logout is enabled, but Authentik still asks if the user want to end all SSO sessions
The second one is backchannel logout: if a user signs out of their SSO session at the identity provider level (instead of just a single application), the identity provider can notify all other applications that the user should be logged out now (so they can invalidate their sessions, too). Unfortunately, this feature is currently not supported in Authentik (as far as I can tell), but you can use it if you have a different identity provider (e.g. Keycloak). Note that this feature requires that the identity provider can make a direct POST request to the applications (e.g. Nextcloud instance), which may not always be the case depending on your firewall settings or network topology.
Learn more about OIDC Single Logout.
# Conclusion
While this blog post turned out much longer than I initially expected, I would still say that overall this setup was much simpler than the Nextcloud SAML integration I wrote about previously. Even though the documentation of the “official” OIDC app (official as-in provided by the core maintainers) is quite sparse, with a bit of experience in the OpenID Connect realm it is pretty straightforward. (The lack of official documentation is also the reason I made sure to describe all the details in this post.)
I’m relatively confident that this setup will be stable over the next couple of years and will put me in a good position to roll out 2FA in my homelab.