Creating GPX overlay videos on Linux
One of my recent posts included some footage from an onboard camera that was overlayed with a telemetry dashboard containing information such as speed, location, altitude, slope and a map. Since it took quite a while to find a software capable of producing this, in this post I’d like to share my workflow for creating these videos.
I was specifically looking for a free and open-source software that I could run on Linux. There are several options (such as gpx2video and gopro-telemetry) available that fit these requirements, but I went for gopro-dashboard-overlay: an excellent piece of software written in Python with a very active and responsive developer behind it. It also produces really pretty overlays out-of-the-box!
At it’s core, gopro-dashboard-overlay allows creating video overlays from video files recorded with a GoPro.
This works because GoPro camera store GPS data in the subtitle track of the video - see this introduction to the GoPro Metadata Format.
Since my action camera is not a GoPro and does not embed GPS data inside the video, I’m using it simply to record the video. Meanwhile, my bike computer is capturing the GPS track.
Fortunately, the developer of the tool was kind enough to implement support for rendering just the overlay video (without the recorded part). This is great because it means the tool can now produce overlays that can be used with footage from any type of camera (not just GoPros) along with GPS tracks recorded with any device!
# Installation
The first step is downloading the Python package (for reference, I have been using version v0.61).
Make sure you have Python3, a recent FFmpeg and the “Roboto” font installed on your machine.
Then proceed with:
| |
Alternatively it is also possible to use the provided container image, which already includes all necessary dependencies.
# FIT and GPX files
If the location track was recorded with any kind of smartwatch, fitness tracker or bike computer, it can most likely be exported as a FIT file: a format that contains GPS positional data as well as health data (heart rate etc.). While it was originally developed by Garmin, these days it is used as the de-facto standard in the fitness tracking sector.
Note: converting the FIT file to GPX is no longer required since newer versions of the gopro-dashboard tool (>= 0.68.0) support reading FIT files directly.
To convert the FIT file to a GPX file, the GPSBabel CLI can be used:
| |
The file output.gpx should contain XML content that starts with something like <?xml ... ?><gpx ...>.
# Producing the overlay
Before invoking the Python tool, a FFmpeg profile needs to be configured for it.
This tells gopro-dashboard.py with which encoding settings it should run FFmpeg.
For a high-quality overlay, I’m using the (lossless) PNG codec, though it produces quite large files as we’ll see in a bit.
~/.gopro-graphics/ffmpeg-profiles.json
| |
Now the GPX file can be fed to gopro-dashboard.py, alongside a couple of parameters (see the online documentation for more command-line options):
| |
Note that for optimal results, the overlay-size parameter should match the resolution of the video footage.
Hence in my case I’m setting it to 1920x1080.
The output file will be written to dashboard.mov (i.e. the last parameter).
Depending on the duration of GPX track, rendering the overlay video might take quite a while. It will also produce a pretty large file, since the output video is saved with a lossless PNG codec. In my case it produced a 88GiB file with 5.5 hours of overlay video! (approx. 260MiB per minute)
The gopro-dashboard.py tool allows very extensive customization of the layout and elements (“gadgets”) of the overlay by specifying the --layout-xml parameter: it should point to an XML file that describes the desired layout - several examples are available online, here is mine for reference:
| |
At this point, the overlay video should look something like this (sans the media player controls):
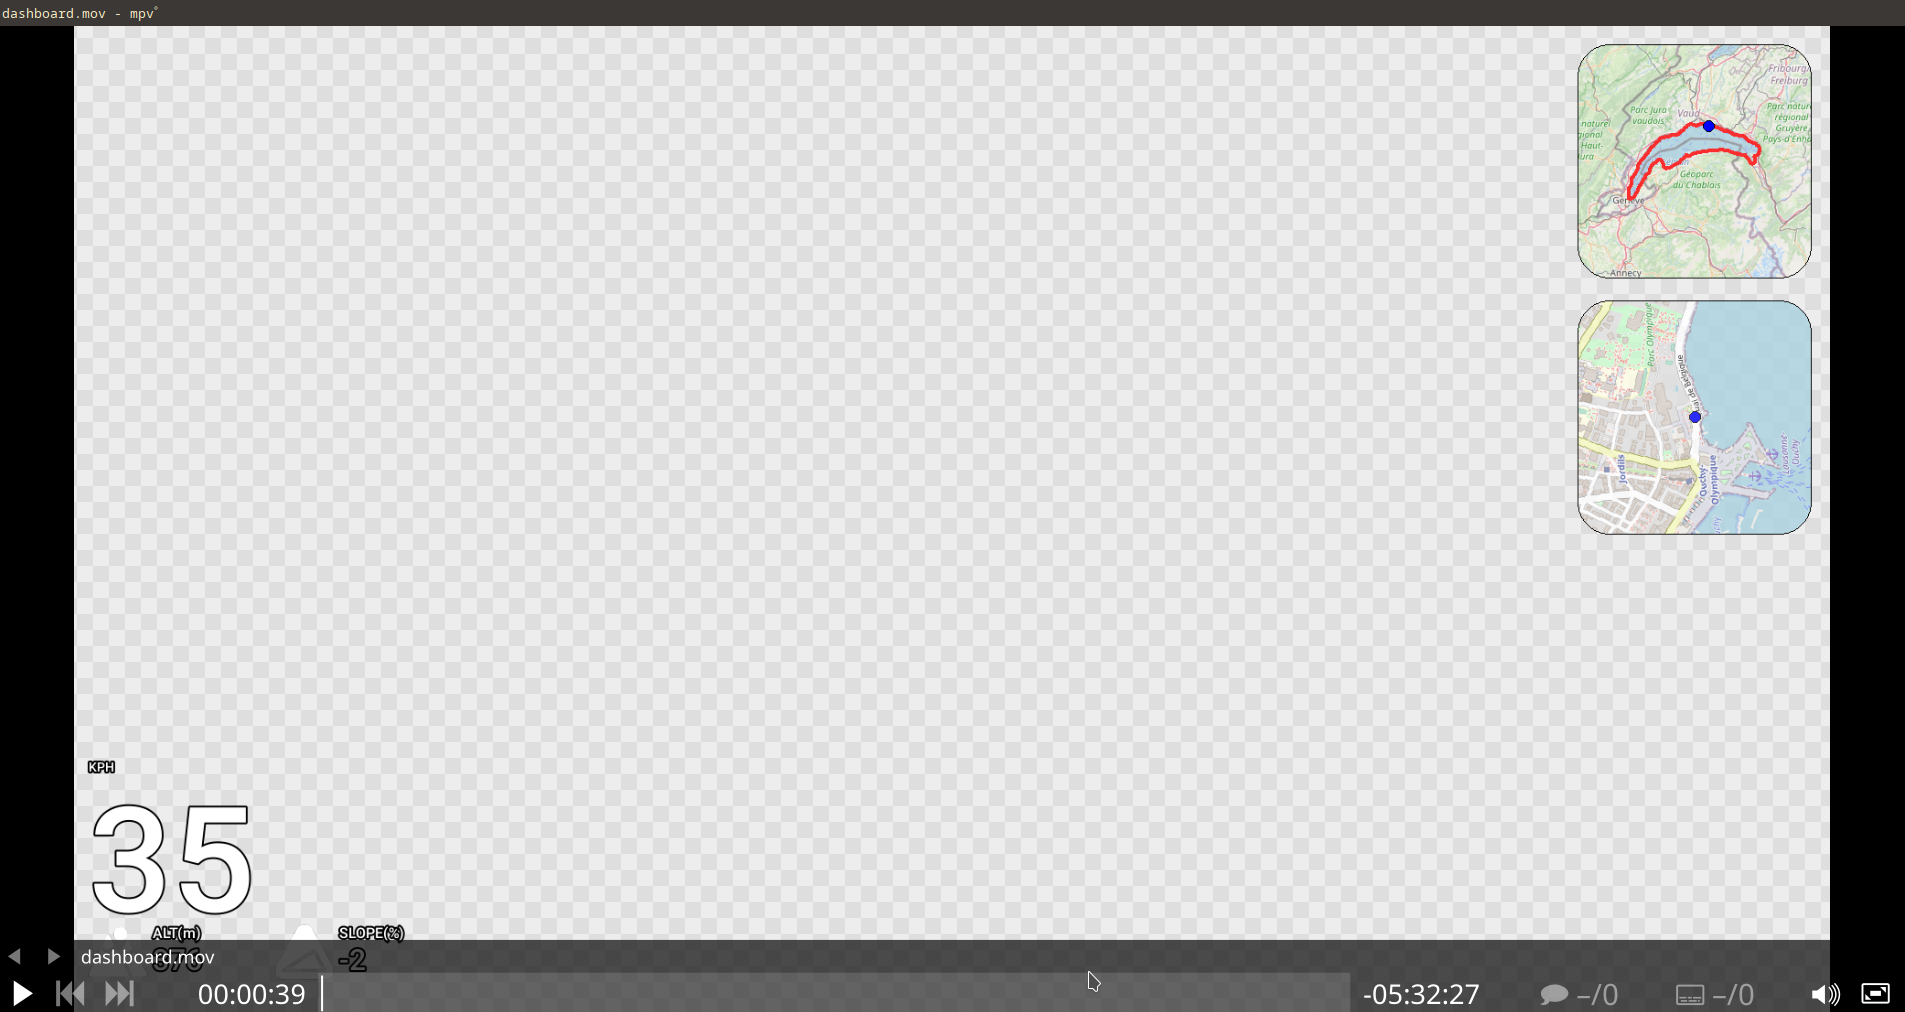
Note that the background of the video is transparent, which means we can stack this video on top of another video and only the indicator gauges will be visible.
# Merging overlay and recorded footage
For the final step, any advanced video editor that permits multiple tracks (such as Kdenlive) can be used. I have been using Shotcut for my editing needs.

In Shotcut I create two video tracks: in the “lower” track I import the original video (this track is simply called “Video” in the screenshot above), and in the “upper” track I import the freshly generated overlay video (labeled “Dashboard” in the screenshot).
Now comes the tricky part: figuring out the alignment between the video footage and the overlay. Most likely the video camera clock and GPS clock are not exactly synchronized, therefore it requires a bit of trial-and-error to get the correct alignment. Luckily, the fact that speed, location (map) and time are now visible directly on the video helps a great deal with this process.
If there are more than one video files, this synchronization process needs to be repeated multiple times (in my case I have several short clips of recorded video that now need to be aligned to the 5.5 hours of overlay video).
Once I have the synchronization dialed in, I only need to find and decide on the section of video that are actually interesting and should be exported. In Shotcut, Timeline Markers help designating relevant parts of a video and exporting (“rendering”) only those sections.
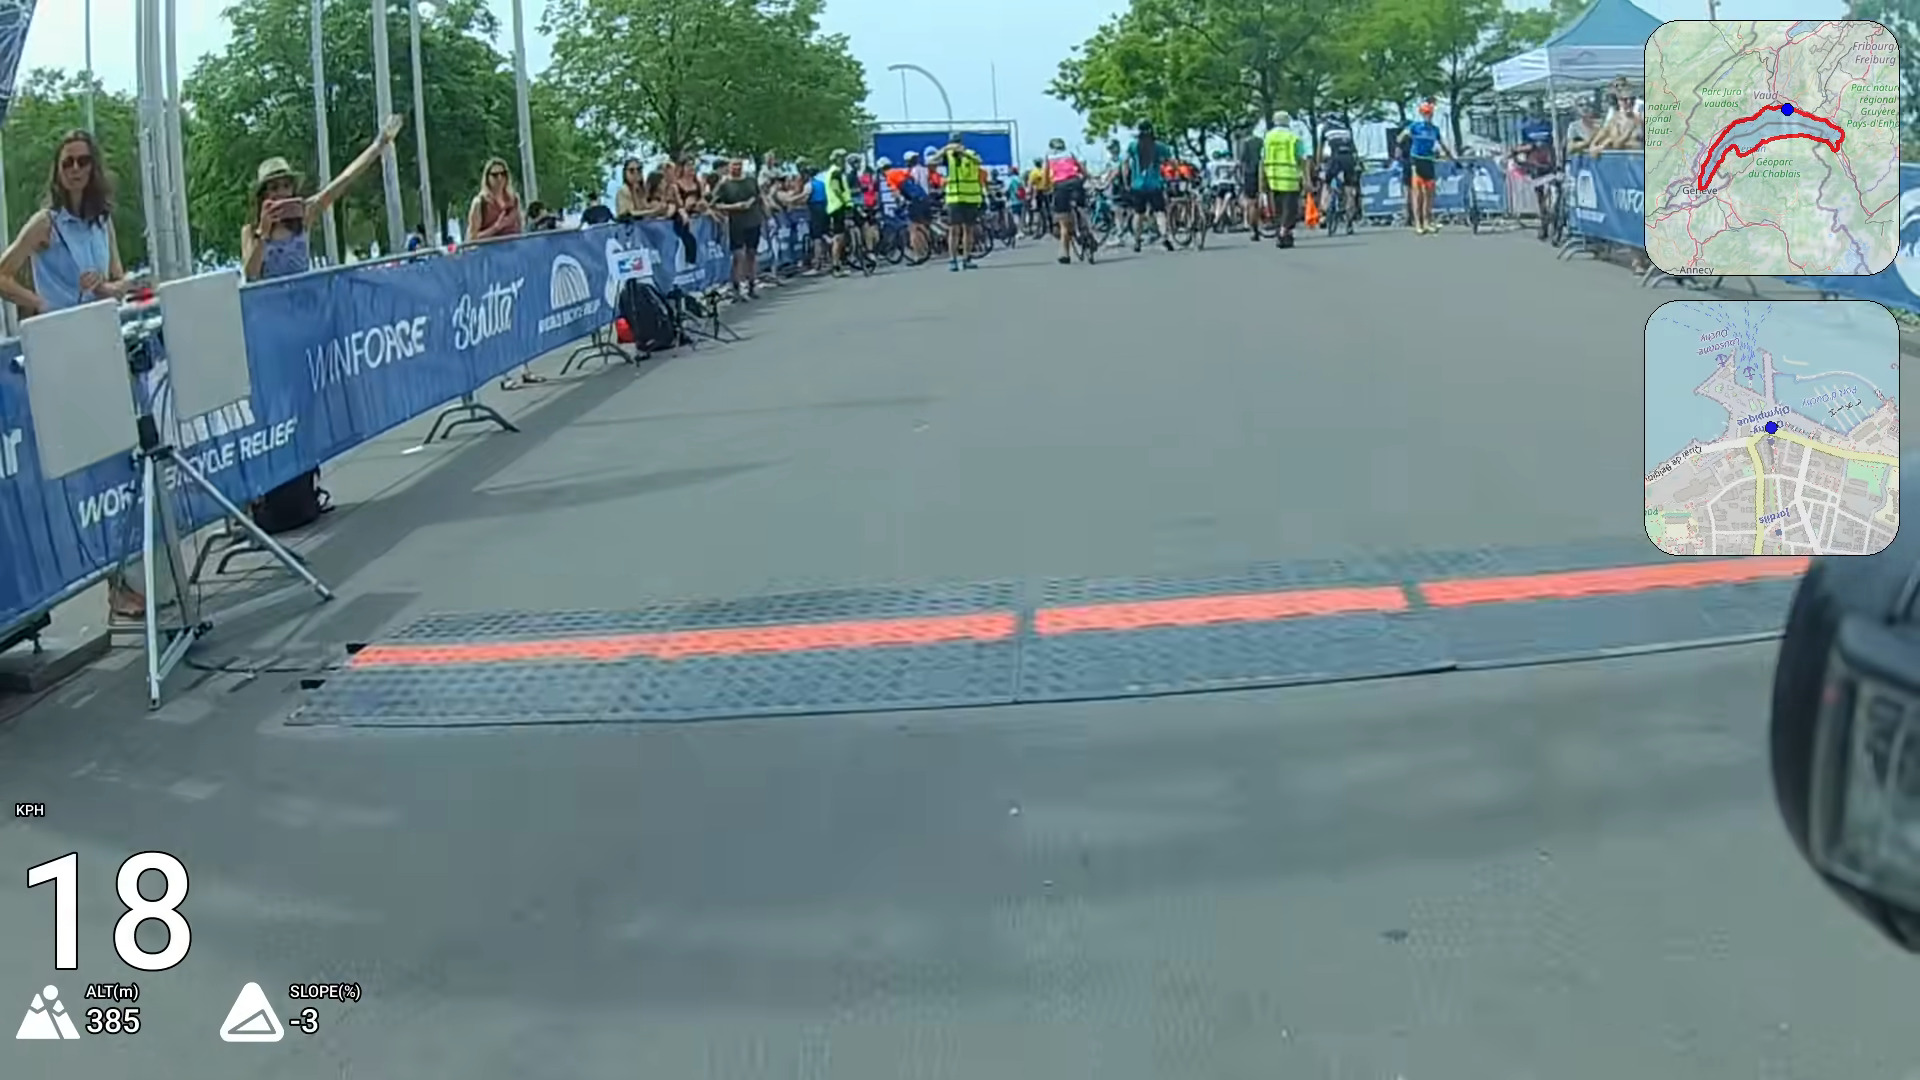
The end result then looks something like this:
Happy recording & rendering!