Getting started with Kopia and Backblaze
For years, I have been using using restic as my backup software of choice for servers and personal machines. There are several aspects I like about restic: it’s lightweight, fast and has a useful all-in-one CLI. On the technical side, it supports client-side encryption out-of-the-box and uses content-addressable storage to implement incremental backups and snapshots.
Recently, I became aware of a new kid on the block: Kopia. At first glance, it seems to offer the same benefits I just mentioned about restic, plus a few more niceties:
- it supports compression - a feature that has been long requested for restic
- it has a (optional) GUI - useful for backups for non-techy friends and family
- it has a stable Go API - allows building anything on top of Kopia
Thus, I decided that I would give it a go on my new homeserver. In this guide I’ll go through Kopia’s basic usage on the command line and how to set it up with Backblaze B2. In between I will also mention some of its advanced concepts, such as compression and retention policies.
All of this is nicely documented in the Kopia docs, but if you are interested in an opionated introduction, follow right along.
# Installation
The first step is downloading the kopia binary, for which there are several options available in the Kopia documentation.
Type kopia --version into your shell to verify the CLI is installed correctly.
| |
# Configuration
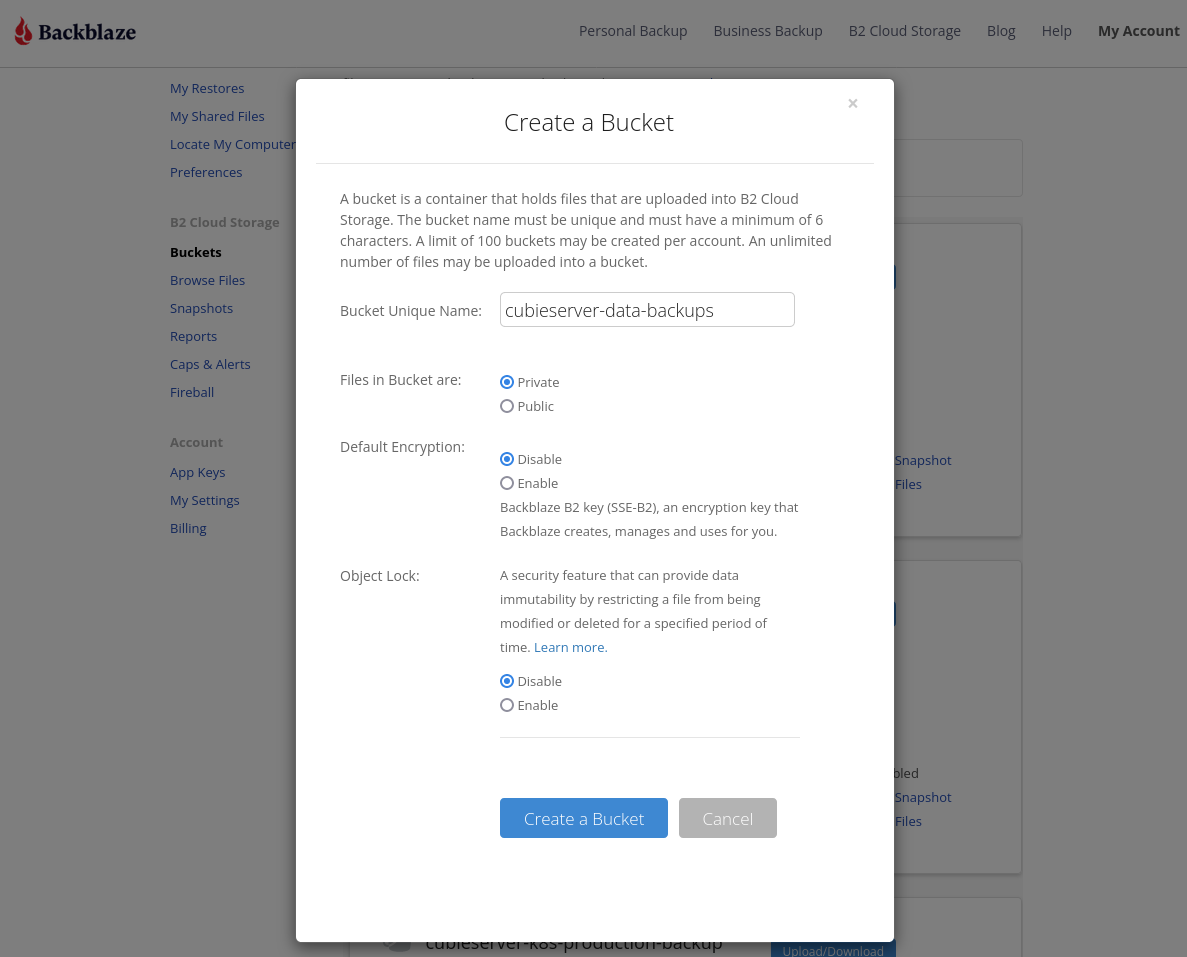
Next, we need to create a storage bucket on Backblaze B2. We don’t need to enable “Default Encryption”, since we’ll be using client-side encryption with Kopia.
And then create a new application key which has access only to the bucket created in the previous step:
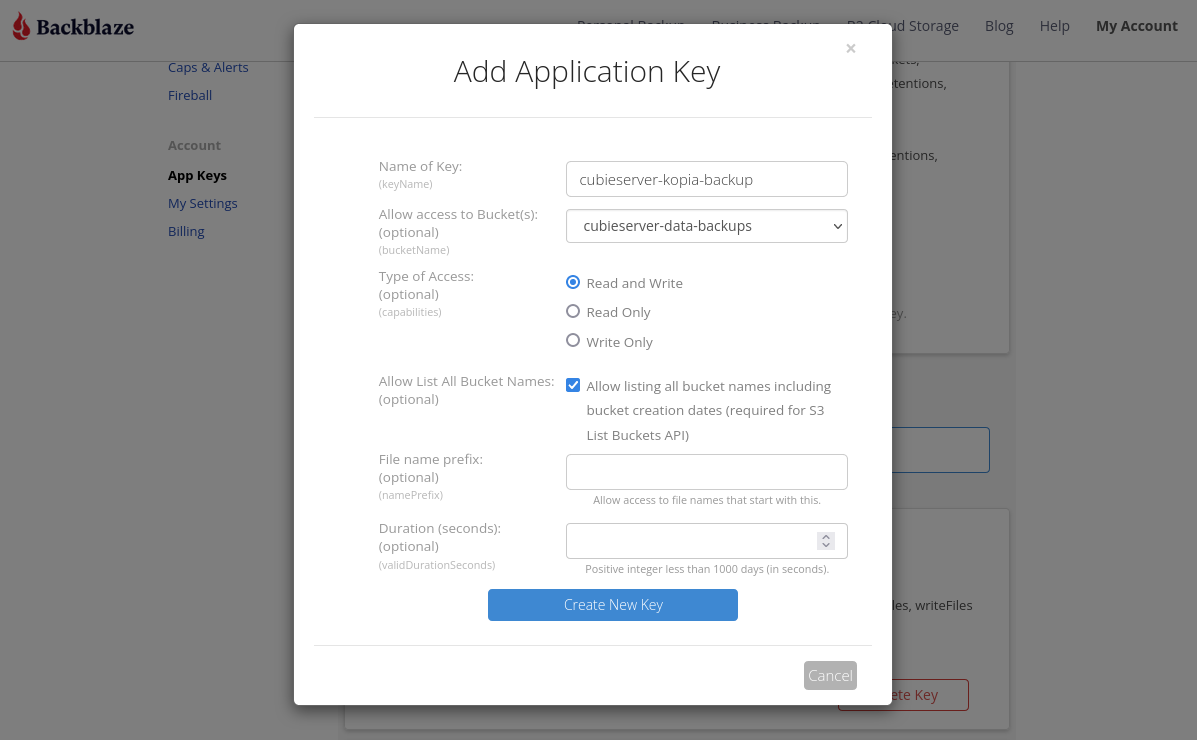
Make sure to copy the keyID and applicationKey which are displayed after clicking Create.
We’ll need them in the next step to configure Kopia for accessing Backblaze.
Additionally, we’ll also need a “repository password” for Kopia – which is a bit confusing, because this password is not used for authenticating to Backblaze, but instead this is the secret used for encrypting the data on the client-side before sending it to Backblaze (or any other storage backend). You can use your favorite password manager or a tool like pwgen to generate this secret - and make sure to store it somewhere safe! We will need it in case we want to access the Kopia backups from another machine.
| |
Reference: kopia repository connect b2
There is lots of output here, but for now the most important line is “Connected to repository”.
You should be aware that Kopia stores the credentials used to connect to the storage backend in plaintext in ${HOME}/.config/kopia/repository.config (or $KOPIA_CONFIG_PATH, if set) until you run kopia repository disconnect.
This behavior can be disabled all-together with the --persist-credentials=false parameter.
Similarly, the repository password will be stored in ${HOME}/.config/kopia/repository.config.kopia-password.
If you want to avoid this, you can set the environment variable $KOPIA_PASSWORD instead of using the --password argument.
Kopia also provides a command to check that the connection to the storage backend works as expected (great, I love self-checks!):
| |
Looks good!
There are two things in the output shown above which we still need to address: the compression policy and the retention policy.
As-per Kopia’s documentation, compression can either be enabled per directory with kopia policy set <path> --compression=zstd or for all directories with kopia policy set --global --compression=zstd.
Enabling compression can reduce the required upload bandwidth (potentially making backups faster) and storage requirements (lowering costs), especially if you have a large amount of compressible data, such as text documents, log files or database dumps.
However, if your data is already compressed in one form or another (such as videos, music, pictures or compressed archives), this likely won’t make much of a difference and might even make the backups slower due to the additional CPU overhead.
For this reason, Kopia allows setting minimum and maximum file sizes for compression as well as including and excluding certain file extensions from compression, see kopia policy set –help.
As a concrete example, these are the compression statistics for my generic 100GiB dataset which has mix of pictures, documents, music and other files (basically $HOME):
| |
Roughly half of the data was left uncompressed by Kopia, because it noticed that the data is not compressible. On the other half Kopia achieved a meager compression ratio of 8.2% with the zstd compression algorithm.
For a detailed discussion about compression including benchmarks check Kopia’s dedicated documentation page.
The retention policy configures how many snapshots Kopia should preserve for this particular repository. The default retention policy (shown above) stores quite a lot of snapshots, I like to go with the following, lighter policy (assuming daily backups):
- keep last 30 daily backups
- keep last 12 monthly backups
Just like for compression previously, this policy can either be enabled per directory or globally for all directories:
| |
# Backup
Great, at this point we are ready to perform our first backup! We just need to point Kopia to the directory it should take a backup of:
| |
We can also give the snapshot a name with the --description parameter.
If we want to exclude this snapshot from automatic deletion by the retention policy configured above, we can use --pin.
Taking the first snapshot usually takes a while, because Kopia needs to upload all the data. Subsequent snapshots will be much faster, because only the changes will need to be uploaded (a.k.a. incremental backups).
You will also notice that Kopia performs some maintenance operations immediately after creating a snapshot (it checks for example if there is unused data in the repository). I personally think this behavior makes sense for most users, unlike e.g. restic where these maintenance operations need to be trigger explicitly by the user. However, in certain circumstances where you want to have more control and predictability (e.g. while scripting), these automatic maintenance operations can be disabled with command-line arguments.
Reference: kopia snapshot create
# Restore
Creating backups is of course only one half of the equation.
Most importantly, we also need to be able to restore our data.
Kopia allows mounting each individual snapshot as a regular filesystem, which makes recovering a subset of files (or all files) extremely easy.
Since it’s a using FUSE for this operation, make sure you have the fusermount tool installed (usually available in the fuse or fuse3 distribution packages) otherwise you might see errors like stat /bin/fusermount: no such file or directory.
| |
Reference: kopia mount
Alternatively, if we already know exactly which folder or file we want to retrieve, we can use Kopia’s restore command directly:
| |
Reference: kopia restore
# Conclusion
After this first experiment with Kopia, I have to say I’m extremely impressed. The CLI tool is very ergonomic (especially when you’re already used to restic’s repository/snapshot/retention concepts) and everything seems very well documented.
I really hope this tool will have a long and healthy career.
Happy backing up!